| Panel | ||||||
|---|---|---|---|---|---|---|
| ||||||
This guide is intended to provide the installer with a step-by-step walkthrough on replacing the Dell Optiplex XE3 SSD. |
| Warning |
|---|
IMPORTANT Disconnect any electrical device from power before performing any work on the device. It is recommended that the instructions contained herein be performed by individuals who are qualified to perform these tasks. Card Concepts Inc. takes no responsibility for the accuracy of this document or any damage that may occur to target equipment. Technical Support recommends using all appropriate safety equipment (such as hand and eye protection) during execution of the instructions below. |
Step-by-step guide
Remove the SSD:
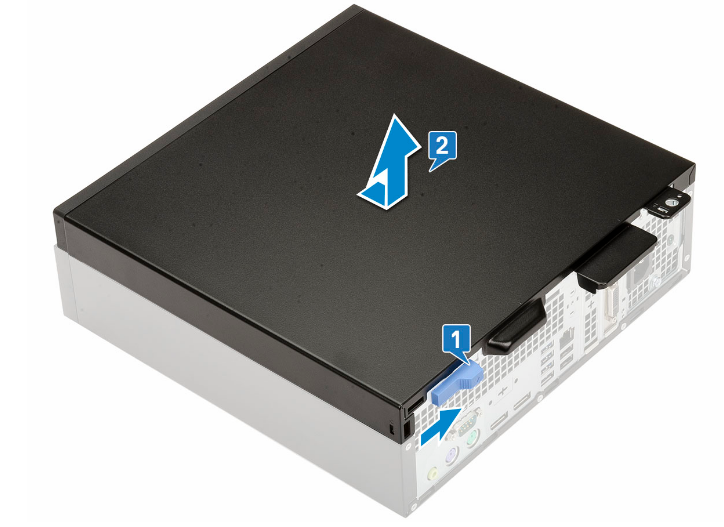
- Remove the top lid of the computer by pushing the release latch on the back side of the computer until it gives a click sound to unlock the cover [1]. Slide and lift the cover from the system [2].
- Remove the:
ide cover
Front bezel
HDD assembly
Hard drive and optical drive module
Heatsink assembly
Remove/Install the SSD:
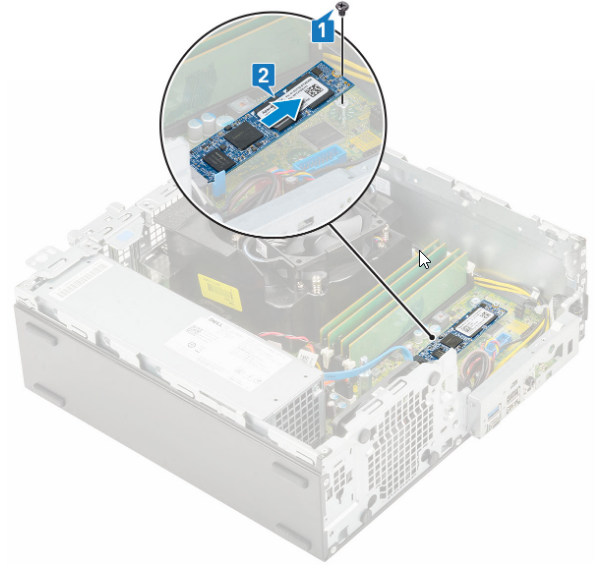
- To remove the M.2 PCIe SSD:
- Remove the single (M2x3.5) screw that secures the M.2 PCIe SSD to the system board board [1].
- Lift and pull out the PCIe SSD from its connector on the system board [2].
ide cover
Front bezel
HDD assembly
Hard drive and optical drive module
Heatsink assembly
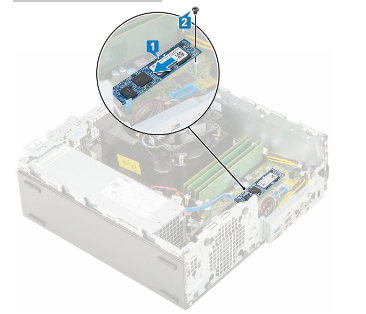
Install the new M.2 PCIe SSD:
- Place the SSD thermal pad into the slot on the system board [1] .
- Insert the M.2 PCIe SSD to the connector on the system board [2].
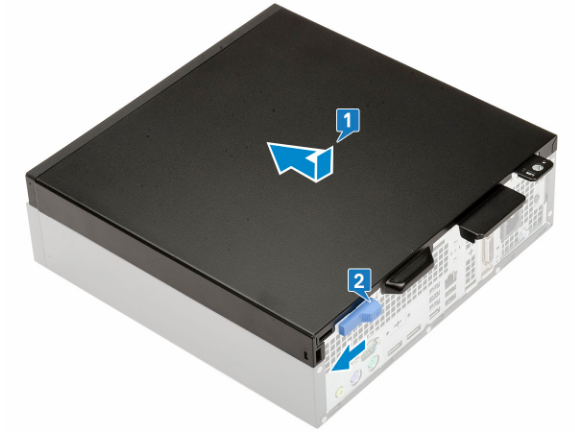
- Place the cover on the computer and slide the cover towards the front of the system [1] until it clicks into place [2].
Related articles
| Filter by label (Content by label) | ||||||||||||||||||||
|---|---|---|---|---|---|---|---|---|---|---|---|---|---|---|---|---|---|---|---|---|
|