Overview
When using the C-1004-V2 MEI Talos Bill Note Acceptor (BNA) in a Touch Kiosk, a specific power cable is utilized separately from the Touch Kiosk's default Power Controller Bill Acceptor port. This detailed page provides information and method of installation for the C-5660-110P BNA Power Cable used.
panelOn this page
| Table of Contents |
|---|
| Warning |
|---|
WARNING Disconnect any electrical device from power before performing any work on the device. It is recommended that the instructions contained herein be performed by individuals who are qualified to perform these tasks. Card Concepts Inc. takes no responsibility for the accuracy of this document or any damage that may occur to target equipment. Technical Support recommends using all appropriate safety equipment (such as hand and eye protection) during execution of the instructions below. |
Introduction
| Bw part list | ||
|---|---|---|
|
Unlike the legacy C-5660 MEI BNA and C-5660-V2 MEI Talos BNA that utilize the 9-pin 24v port on the Power Controller, the C-1004-V2 MEI Talos BNA has a 110vac power requirement. The C-5660-110P BNA Power Cable is specifically designed to power the C-1004-V2 MEI Talos BNA within a Touch Kiosk by drawing power directly from the power supply's Load (L) and Neutral (N) terminals.
Installation
Using either a Manager's Card or the Maintenance Button on the Power Controller to access Manager's Options navigate to Maintenance Menu → Shutdown/Reboot → Shutdown Computer,
Unlock the Touch Kiosk and, on the power supply, switch to the OFF (O) position and disconnect power cable.
Info title Note It is strongly recommended to clear any static discharge before proceeding further.
Remove the two screws that secure the power supply end cover.

Carefully lift off the cover to expose the power supply screw terminal block to reveal the L and N (AC) terminals, among other available terminals.
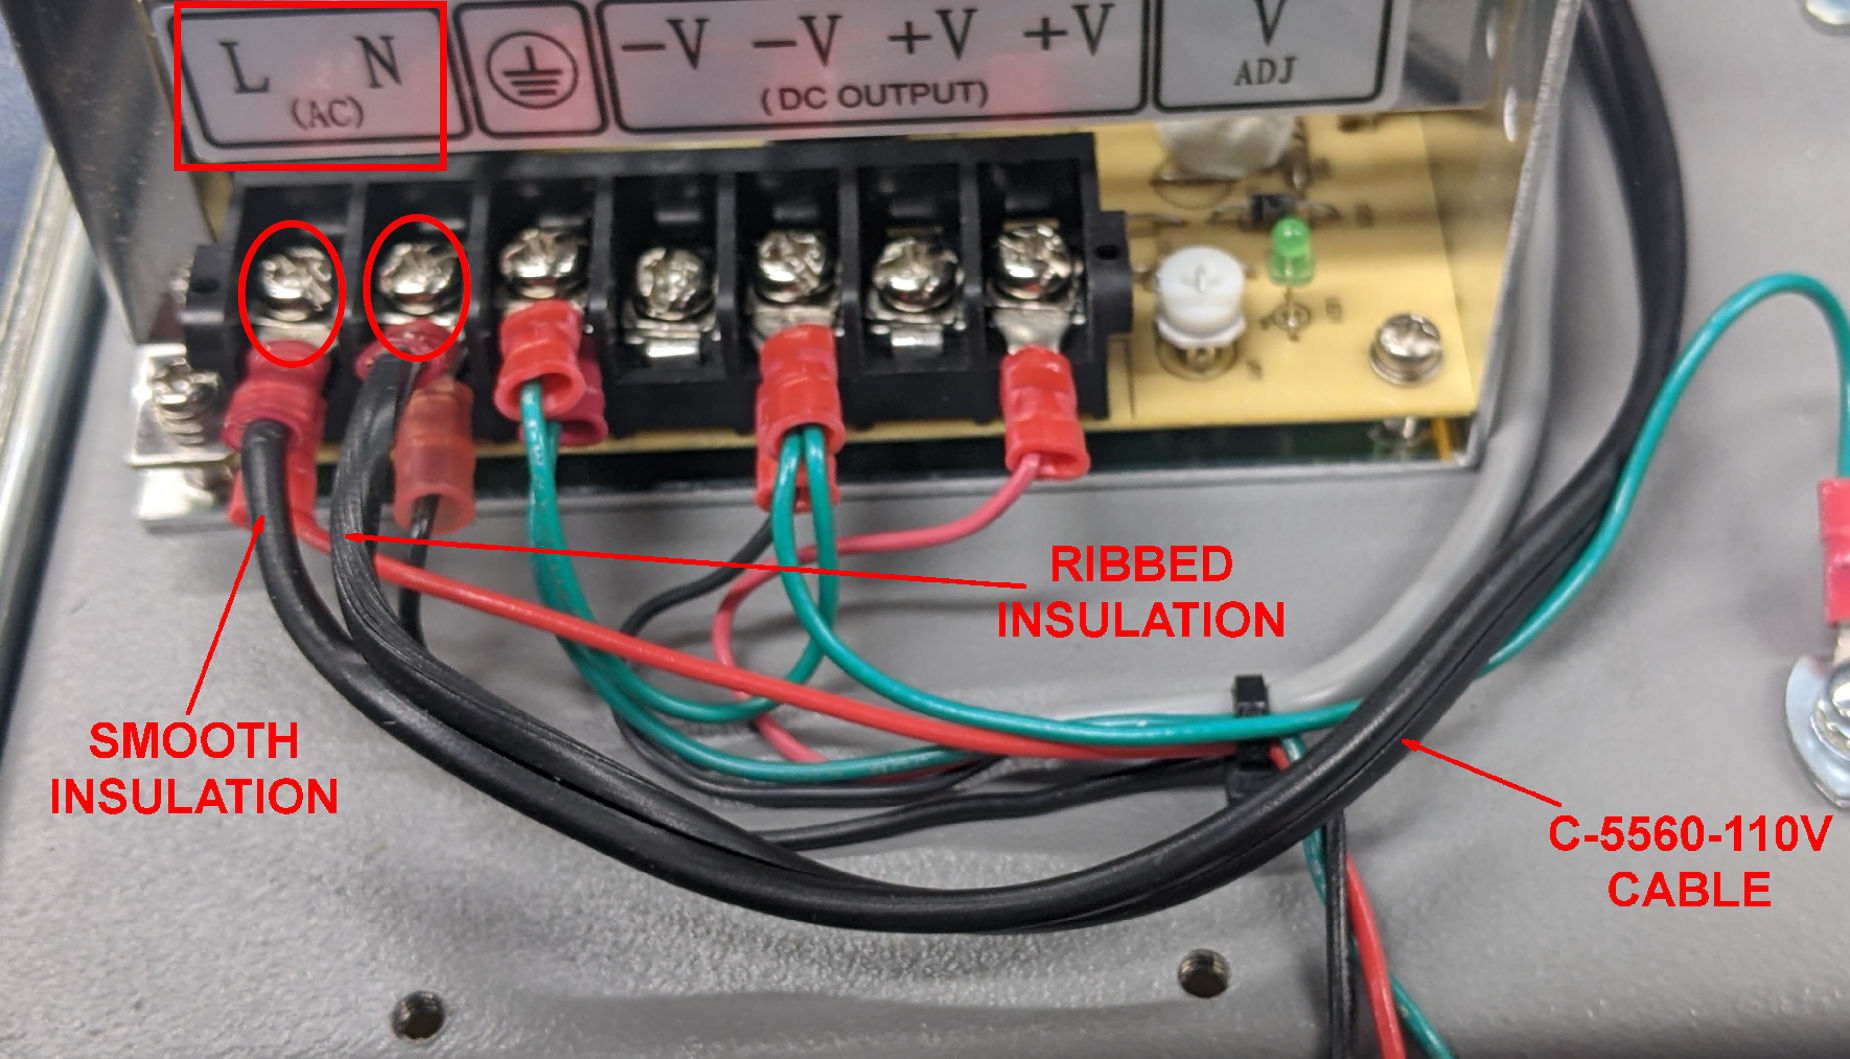
Loosen the L and N screws enough to secure the C-5660-110P terminal forks.
Warning title IMPORTANT DO NOT REMOVE EXISTING WIRES. The C-5660-110P terminal forks will be secured along with the existing installed wiring.
With the C-5660-110P cable:
Secure the Smooth insulated wire fork into the "L" terminal.
Secure the Ribbed insulated wire fork into the "N" terminal.
Ensure both L and N terminals and wiring are tightly secured down.
Carefully replace the power supply end cover with the C-5660-110P cable positioned to exit through the small notch on the right side where the Ground wire comes out from.
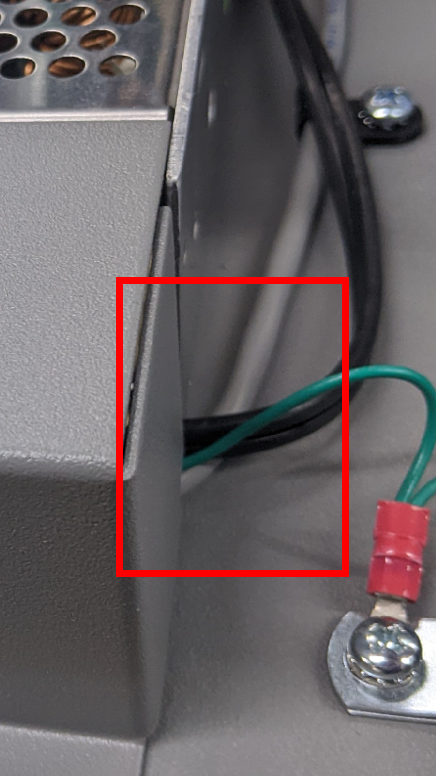
Ensure that no other wiring is exposed upon re-attaching the power supply end cover.
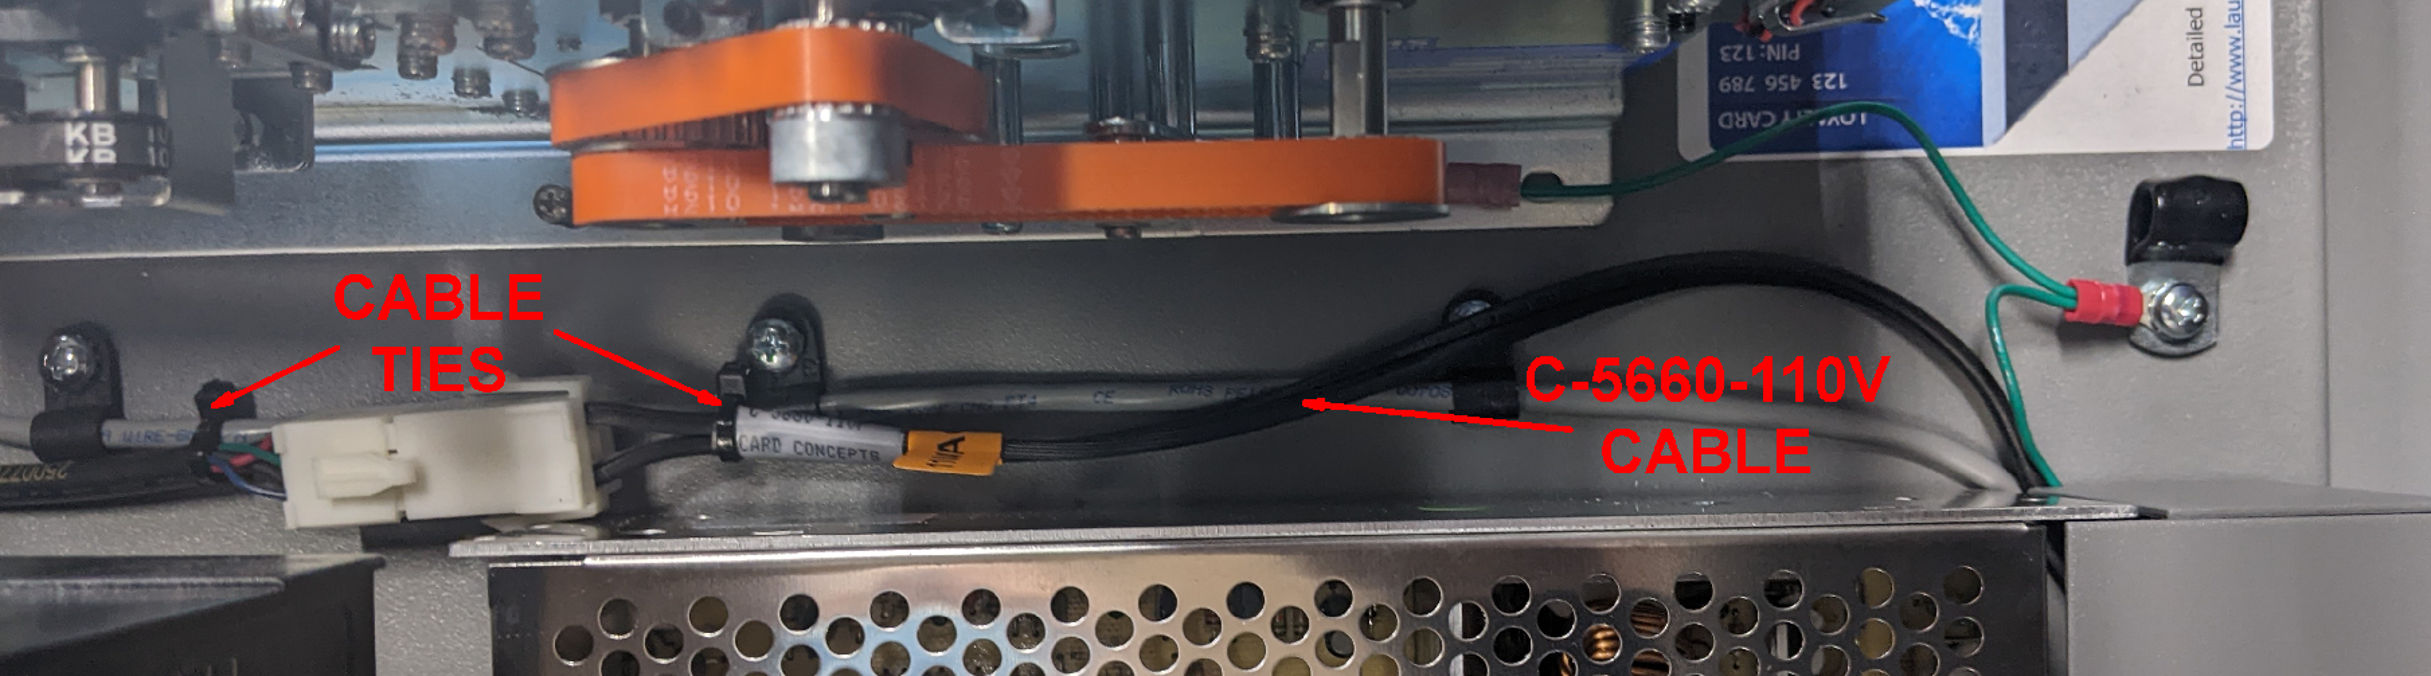
Secure the C-5660-110P cable along the right side with the other wires going toward the front of the unit.
Plug the 9-pin square BNA power cable into the connector on the C-5660-110P cable. Secure cables using cable ties located near the plastic cable clamps.
Related
| Filter by label (Content by label) | ||||||||||||||||||
|---|---|---|---|---|---|---|---|---|---|---|---|---|---|---|---|---|---|---|
|