| Multiexcerpt include |
|---|
| MultiExcerptName | Warning |
|---|
| DisableCaching | true |
|---|
| PageWithExcerpt | CCIDOC:_General |
|---|
|
Required Hardware
Two versions of the touch pad replacement kit exist. The installation of the button membrane is the same for both versions - the primary difference is in the design of the cover label.
Type 1
This kit has been replaced by Type 2, below. It is no longer available.
This kit includes a label to cover the screws on the FasCard reader. The button membrane is pre-labeled.
| Bw part list |
|---|
| Parts | C-5021,C-5050 |
|---|
| SizingMode | Height |
|---|
| ShowDesc3 | false |
|---|
| SingleRow | true |
|---|
|
Type 2
This kit includes a label that covers both the screws on the FasCard reader as well as the button membrane. The button membrane is not pre-labeled. The C-5052 label must be aligned correctly on top of the button membrane.
| Bw part list |
|---|
| Parts | C-5051,C-5052 |
|---|
| SizingMode | Height |
|---|
| ShowDesc3 | false |
|---|
| SingleRow | true |
|---|
|
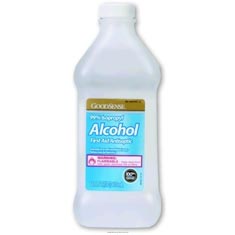
| Phillips screwdriver | Rubbing Alcohol |
|---|
| |
Removing Old Touch Pad
Remove FasCard Reader from machine.Place FasCard Reader on a clean working surface.Instructions
Step 1 - Remove Reader Control Board
- Remove two screws mounted screws mounted on each corner of the main card reader board.
 Image RemovedTilt main board away , highlighted in Fig.1a.
 - Tilt control board away from grey bezel, and lift it out.
 Image Removed
 Image Removed
 Image Added
  Image Added
  Image Added
- Remove blue/silver stripe ribbon cable from stripe ribbon cable from wi-fi radio board, highlighted in Fig. 2a. Gently pull up on cable to remove.
 Image Removed
 - Remove the screw cover label, then remove the touch pad.
 Image Removed
.jpg?version=1&modificationDate=1412955340167&cacheVersion=1&api=v2&height=250) Image Removedthe touch pad - the connected ribbon cable should slide out with the button membrane.
Image Removedthe touch pad - the connected ribbon cable should slide out with the button membrane. - Clean the touch pad and cover label surface with rubbing alcohol to remove all adhesive residue.
 Image Removed
 Image Removed
Installing New Touch Pad Image Added
 .jpg?version=1&modificationDate=1412955340167&cacheVersion=1&api=v2&captionId=43909204&&height=150) Image Added
Image Added  Image Added
  Image Added
- Fold the touch pad ribbon cable up up as shown below.
%20(Small).jpg?version=1&modificationDate=1413365500140&cacheVersion=1&api=v2&height=250) Image Removed
Image Removed - Peel off both protective backing pieces to expose the touch pad adhesive.
 Image Removed
 - Insert the folded end of the ribbon cable through the bezel opening. Make sure the fold is facing down so the "up arrow" is on the left and "enter dash" is on right.
 Image Removed
 Image Removed
 Image Removed
- If the button membrane replacement is C-5051 type, installation is the same but the C-5052 label must be applied in the correct alignment. See images below for reference.
 Image Removed Image Removed
|  Image Removed Image Removed
|
Connect ribbon cable back - Fig. 3d and 3e, below.
%20(Small).jpg?version=1&modificationDate=1413365500140&cacheVersion=1&api=v2&captionId=43909240&&height=150) Image Added
Image Added  Image Added
  Image Added
  Image Added
  Image Added
Step 4 - Reconnect Touch Membrane to Control Board
- Connect ribbon cable back to wi-fi radio board, then put remaining components back together.
Attach cover label after reader is re-mounted to machine.
 Image Removed(Refer to Step 2 if needed)
- If using the older C-5050 Button Membrane, apply the C-5021 screw cover label once the card reader is mounted on the associated machine.
 Image Added


.jpg?version=1&modificationDate=1412955340167&cacheVersion=1&api=v2&height=250)


.jpg?version=1&modificationDate=1412955340167&cacheVersion=1&api=v2&captionId=43909204&&height=150)


%20(Small).jpg?version=1&modificationDate=1413365500140&cacheVersion=1&api=v2&height=250)


%20(Small).jpg?version=1&modificationDate=1413365500140&cacheVersion=1&api=v2&captionId=43909240&&height=150)


