| Panel | ||||||
|---|---|---|---|---|---|---|
| ||||||
This guide is meant to walk the end-user through creating a VPN connection in Windows 10. |
| Table excerpt include | ||||||
|---|---|---|---|---|---|---|
|
Step-by-step guide
Create the connection
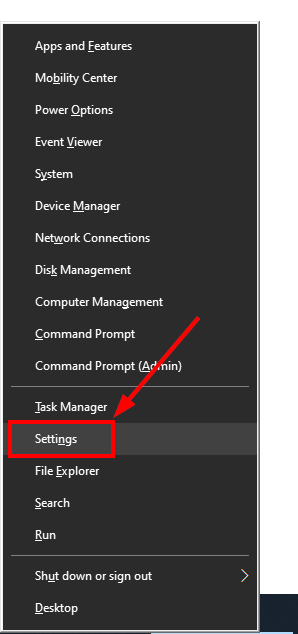
Right-click the Start button.
...

Click Settings.
...
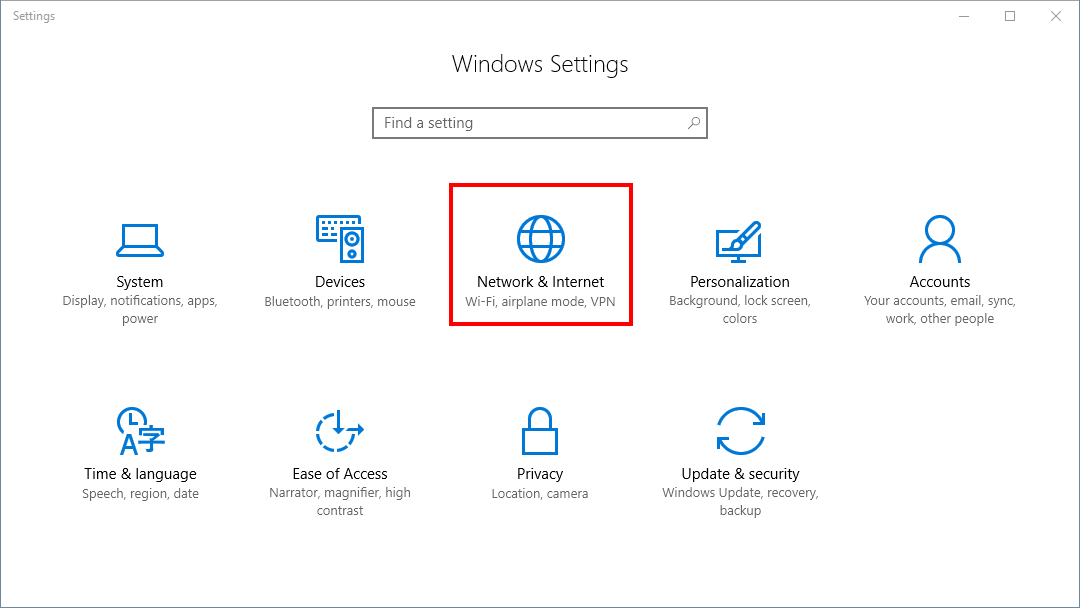
In the Windows Settings dialog click Network & Internet.
...
On the left-hand side click VPN.
...
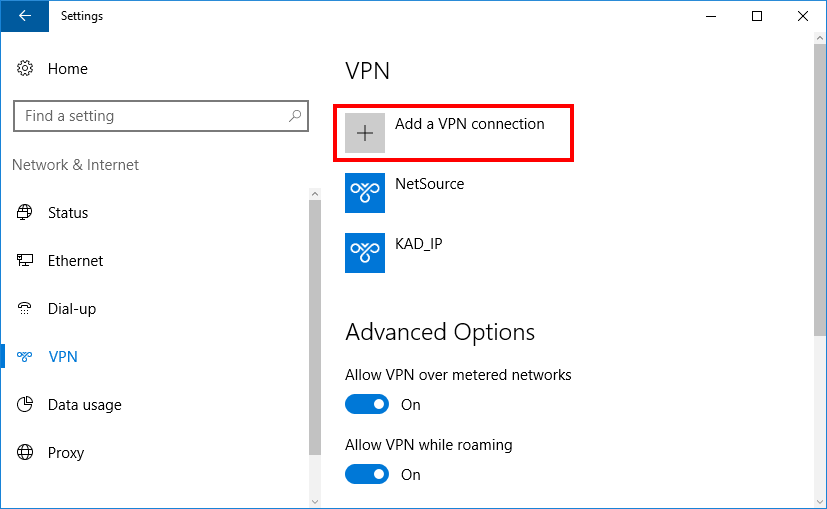
From the right pane, click Add a VPN connection.
...
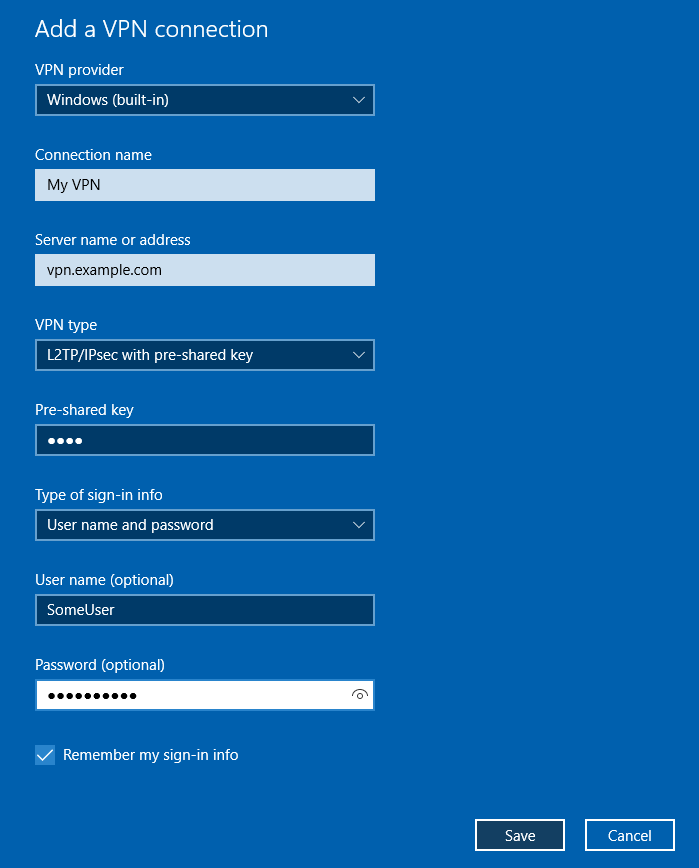
On the Add a VPN connection box, populate the fields as follows:
VPN Provider: Windows (built-in)
Connection Name: <give the connection a friendly name you will understand>
Server name or address: <enter the ip address or dns name (ie. vpn.somesite.com)>
VPN Type: <choose the appropriate type; generally either "Point to Point Tunneling Protocol (PPTP)" or "L2TP/IPsec with pre-shared key"
L2TP PreShared Key - NoMoreCoins2Collect
Type of sign-in info: User name and password
User name (optional): <your username>
Password (optional): <your password>
Remember my sign-in info:

Press the Save button.
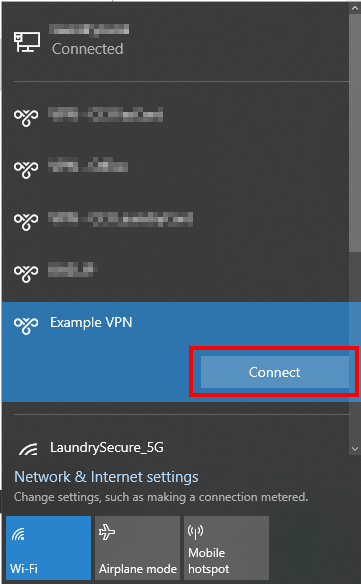
How to connect
Once the connection has been created, click the Network icon in the System Tray (bottom-right area of the screen).
NOTE: The icon will vary depending on whether your computer is connected via a cable or wireless.
...


Click on the desired connection and then click Connect.
...
Related articles
| Filter by label (Content by label) | ||||||||||
|---|---|---|---|---|---|---|---|---|---|---|
|
...
|