This page is intended to guide the user through the basic maintenance and diagnostic functions available on a FasCard reader.
Panel
borderColor
#416EB6
titleColor
#e6e6e6
titleBGColor
#416EB6
title
On this Page
Table of Contents
maxLevel
2
minLevel
2
Determine Reader Generation
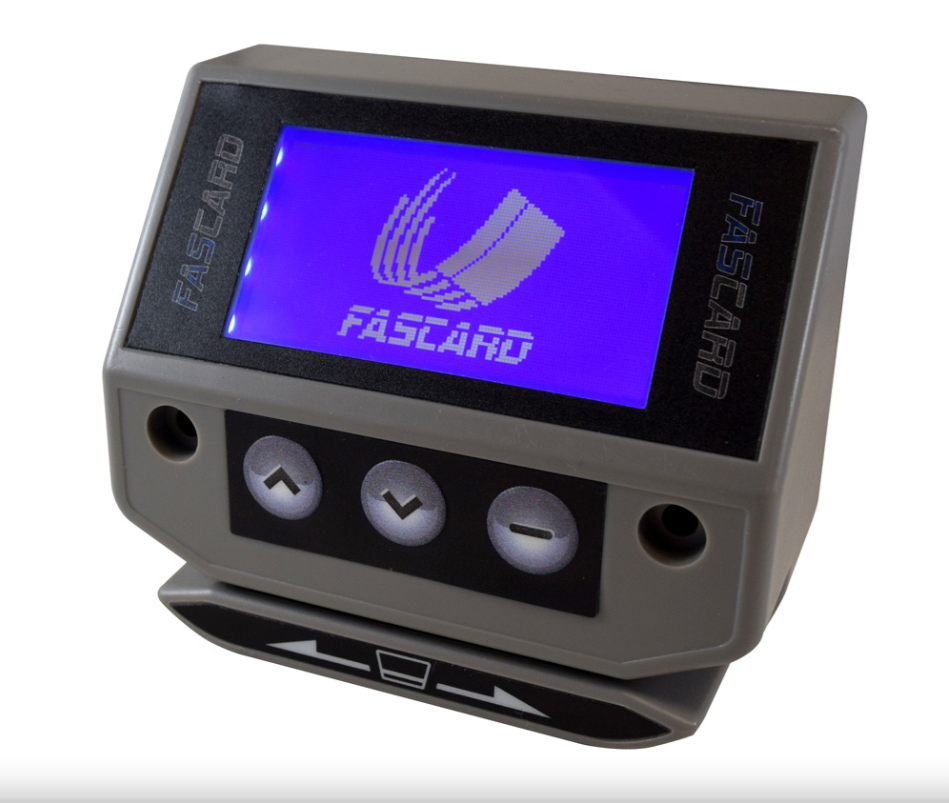
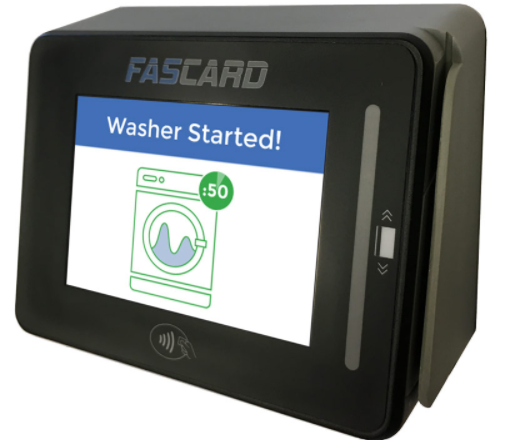
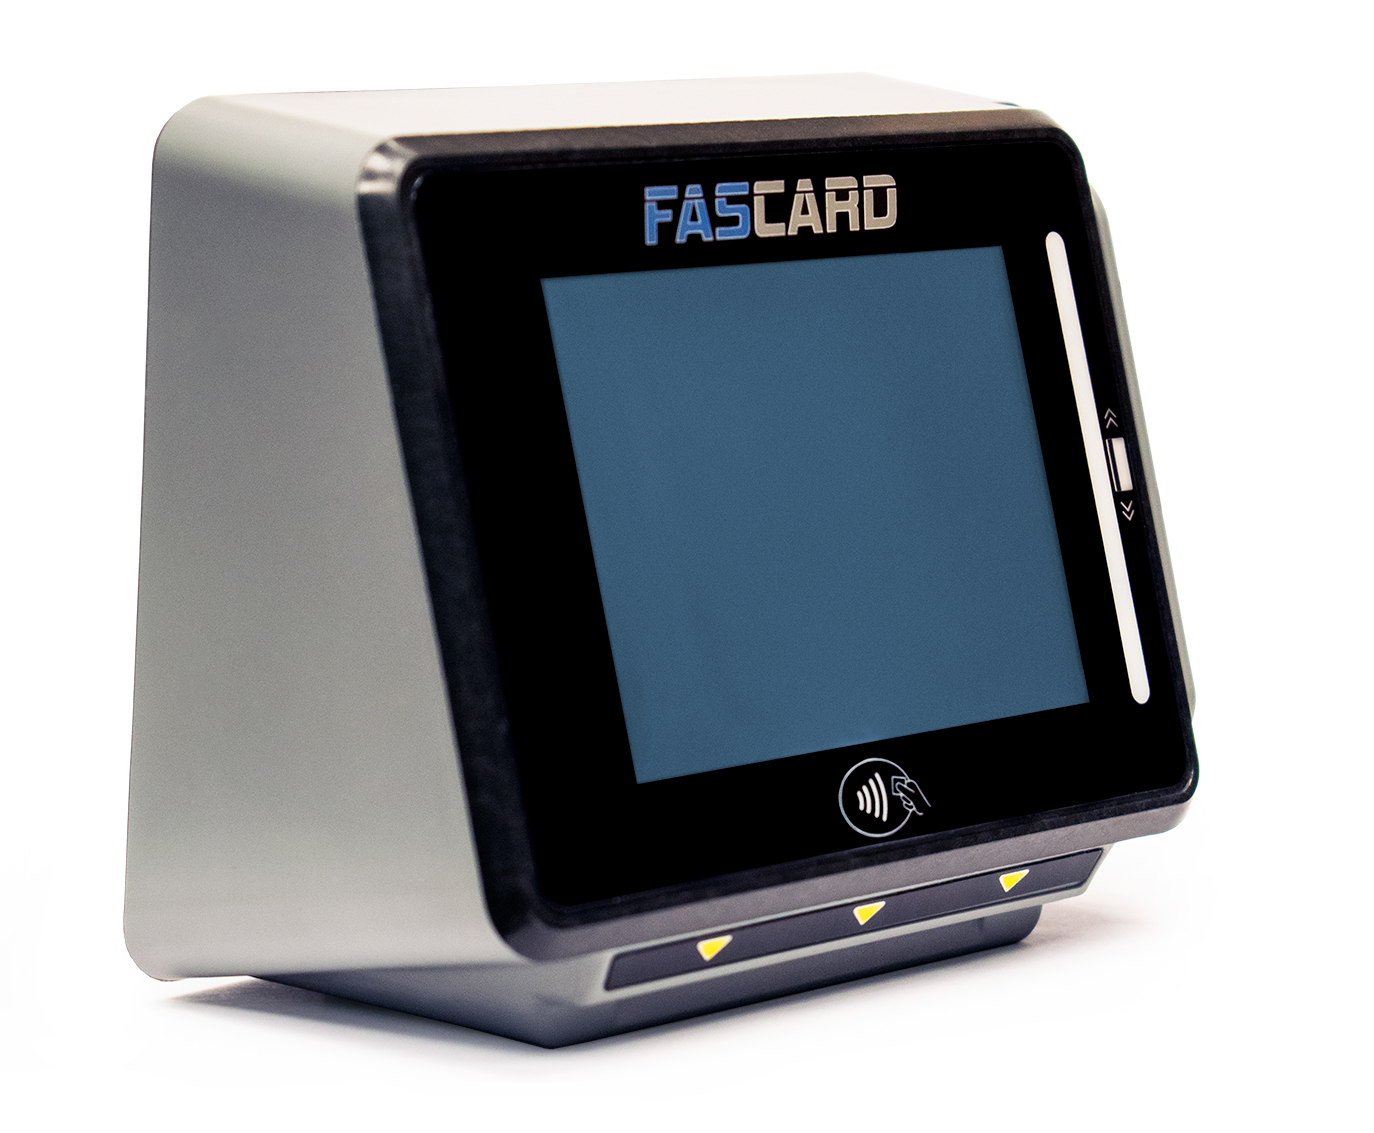
Refer to the images below to determine reader generation. Click the appropriate tab below to view available maintenance and diagnostic functions.
F1 Reader
F2 Reader
F3 Reader
General Diagnostic Icons
Icon
Indication
This icon appears on the reader when the satellite loses connectivity to the FasCard server.
This Icon appears on the reader when the card reader loses WiFi connectivity to the satellite.
Ui tabs
Ui tab
title
F1 FasCard Reader
F1 FasCard Reader Maintenance Menu
The F1 FasCard reader maintenance menu can be accessed in the following ways:
Method 1
Swipe a Manager's card or any card with privileges.
Select Maintenance menu and press the enterbutton button.
Method 2
Reboot the card reader- after the FasCard logo disappears and the pricing information is shown, press and hold all three buttons (3buttons) simultaneously.
Select Maintenance menu and press the enterbutton button.
The FasCard reader Maintenance menu offers several options, detailed below.
Change machine# - This option allows the user to .
Trigger relay - This option will cause the pulse relay to trigger. Machines configured for pulse will read this as a coin drop and the relay should emit an audible click as it triggers.
Re-orient buttons - This option allows the user to choose which button on the touch pad will serve as the 'Enter' button. Users can select either the upbutton button or the enterbutton button. This option is typically used when a reader is mounted in an inverted fashion.
Reboot reader - This option will perform a soft reboot of the card reader.
Back - This option returns the user to the previous menu.
F1 FasCard Reader Diagnostics Menu
The F1 FasCard reader diagnostic menu can be accessed in the following ways:
Method 1
Swipe a Manager's card or any card with privileges.
Select Diagnostics menu and press the enterbutton button.
Method 2
Reboot the card reader- after the FasCard logo disappears and the pricing information is shown, press and hold all three buttons (3buttons) simultaneously.
Select Diagnostics menu and press the enterbutton button.
The FasCard reader Diagnostics menu offers several options, detailed below.
Start Diagnostics - This option will load the FasCard reader diagnostic screen. This function is typically used under the direction of Technical Support. Additional information regarding the diagnostic screen can be found below.
Show Satellite Status - This option will display satellite related information including satware version, addressing information, and network status.
Show Versions - This option will display card reader information including the configured reader address, firmware type, and firmware version.
Back - This option returns the user to the previous menu.
Using FasCard Diagnostics
A: This indicates the configured card reader address.
B: This indicates the rate of loops per second the reader is executing the main task. This value is not indicative of the actual clock speed of the internal processor.
C: This indicates the wifi signal strength.
D: This indicates a portion of connected Satellites MAC address.
E: This line will display A, B, and C when individual buttons are pressed and is used to test their functionality.
F: This line indicates which tracks are read when a card is swiped. The number shown after the '/' changes each time a swipe is detected. Recent versions of firmware also indicate the type of card swiped:
'L' = Loyalty card
'C' = Credit card
'?' = Unknown card type
G: This indicates the pulse length registered when a coin is dropped and increments the number of coins after the /.
@anonymousINLINE
Technician Information
The slash in the "Coin" text indicates the input.
"/" = Normally Open (Pins 5 & 6 at reader end)
"\" = Normally Closed (Pins 4 & 5 at reader end)
H: This indicates the functionality of the door sensor.
The FasCard Diagnostics screen is displayed above and functions are outlined adjacent to the image. This screen is displayed when the 'Start Diagnostics' option is chosen in the card reader Diagnostics menu. To stop diagnostics, press the enterbutton key. Return to the "Diagnostics Menu" and select "Stop Diagnostics"
Ui tab
title
F2 FasCard Reader
F2 FasCard Reader Maintenance Menu
The F2 FasCard reader maintenance menu can be accessed in the following ways:
Method 1
Swipe a Manager's card or any card with privileges.
Touch the "Maintenance Menu" button on the touchscreen.
Method 2
Reboot the card reader- after the FasCard logo disappears and the pricing information is shown, press and hold anywhere on the touchscreen.
Touch the "Maintenance Menu" button on the touchscreen.
The FasCard reader Maintenance menu offers several options, detailed below.
Change machine# - This option allows the user to .
Trigger relay - This option will cause the pulse relay to trigger. Machines configured for pulse will read this as a coin drop and the relay should emit an audible click as it triggers.
Reboot reader - This option will perform a soft reboot of the card reader.
Factory Reset - This option will reset all configuration to factory default.
Back - This option returns the user to the previous menu.
F2 FasCard Reader Diagnostics Menu
The F2 FasCard reader diagnostic menu can be accessed in the following ways:
Method 1
Swipe a Manager's card or any card with privileges.
Touch the "Diagnostics Menu" button on the touchscreen.
Method 2
Reboot the card reader- after the FasCard logo disappears and the pricing information is shown, press and hold anywhere on the touchscreen.
Touch the "Diagnostics Menu" button on the touchscreen.
The FasCard reader Diagnostics menu offers several options, detailed below.
Start Diagnostics - This option will load the FasCard reader diagnostic screen. This function is typically used under the direction of Technical Support. Additional information regarding the diagnostic screen can be found below.
Show Satellite Status - This option will display satellite related information including satware version, addressing information, and network status.
Show Versions - This option will display card reader information including the configured reader address, firmware type, and firmware version.
Back - This option returns the user to the previous menu.
Using FasCard Diagnostics
1: "MACH" - This indicates the configured card reader address.
2: "UPTM" - This indicates how long the reader has been operational.
3: "CPU" - This indicates the rate of loops per second the reader is executing the main task (the first number), followed by the maximum time in milliseconds that the reader spent to execute a single loop. These values are not indicative of the actual clock speed of the internal processor.
4: "SLINK" - This indicates the reader is properly communicating with the satellite.
5: "WIFI" - This indicates the wifi signal strength.
6: "SAT" - This indicates a portion of connected Satellites MAC address.
7: "TOUCH" - This line indicates the last gridpoint touched on the touchscreen.
8: "MSR" - This line indicates which tracks are read when a card is swiped. The number shown after the '/' changes each time a swipe is detected. Recent versions of firmware also indicate the type of card swiped:
'L' = Loyalty card
'C' = Credit card
'?' = Unknown card type
9: "COIN1" - This indicates the pulse length registered when a coin is dropped into a drop connected to coin input #1 and increments the number of coins after the /.
@anonymousINLINE
Technician Information
The slash in the "Coin" text indicates the input.
"/" = Normally Open (Pins 5 & 6 at reader end)
"\" = Normally Closed (Pins 4 & 5 at reader end)
10:"COIN2" - This indicates the pulse length registered when a coin is dropped into a drop connected to coin input #2 and increments the number of coins after the /.
11: "NFC" - This indicates whether an active NFC tag has been retrieved from a nearby smart device (e.g. iPhone, Android).
Note: When testing this feature, the smart device will process payment, which would require voiding.
The FasCard Diagnostics screen is displayed above and functions are outlined adjacent to the image. This screen is displayed when the 'Start Diagnostics' option is chosen in the card reader Diagnostics menu. To stop diagnostics, hold any point on the touchscreen until menu options appear. Select "Diagnostics Menu" and then select "Stop Diagnostics".
Ui tab
title
F3 FasCard Reader
F3 FasCard Reader Maintenance Menu
The F3 FasCard reader maintenance menu can be accessed in the following ways:
Method 1
Swipe a Manager's card or any card with privileges.
Touch the "Maintenance Menu" button on the touchscreen.
Method 2
Reboot the card reader- after the FasCard logo disappears and the pricing information is shown, press and hold anywhere on the touchscreen.
Touch the "Maintenance Menu" button on the touchscreen.
The FasCard reader Maintenance menu offers several options, detailed below.
Change machine# - This option allows the user to .
Trigger relay - This option will cause the pulse relay to trigger. Machines configured for pulse will read this as a coin drop and the relay should emit an audible click as it triggers.
Reboot reader - This option will perform a soft reboot of the card reader.
Factory Reset - This option will reset all configuration to factory default.
Back - This option returns the user to the previous menu.
F3 FasCard Reader Diagnostics Menu
The F3 FasCard reader diagnostic menu can be accessed in the following ways:
Method 1
Swipe a Manager's card or any card with privileges.
Touch the "Diagnostics Menu" button on the touchscreen.
Method 2
Reboot the card reader- after the FasCard logo disappears and the pricing information is shown, press and hold anywhere on the touchscreen.
Touch the "Diagnostics Menu" button on the touchscreen.
The FasCard reader Diagnostics menu offers several options, detailed below.
Start Diagnostics - This option will load the FasCard reader diagnostic screen. This function is typically used under the direction of Technical Support. Additional information regarding the diagnostic screen can be found below.
Show Satellite Status - This option will display satellite related information including satware version, addressing information, and network status.
Show Versions - This option will display card reader information including the configured reader address, firmware type, and firmware version.
Back - This option returns the user to the previous menu.
Using FasCard Diagnostics
1: "MACH" - This indicates the configured card reader address.
2: "UPTM" - This indicates how long the reader has been operational.
3: "CPU" - This indicates the rate of loops per second the reader is executing the main task (the first number), followed by the maximum time in milliseconds that the reader spent to execute a single loop.These values are not indicative of the actual clock speed of the internal processor.
4: "SLINK" - This indicates the reader is properly communicating with the satellite.
5: "WIFI" - This indicates the wifi signal strength.
6: "SAT" - This indicates a portion of connected Satellites MAC address.
7: "TOUCH" - This line indicates the last gridpoint touched on the touchscreen.
8: "MSR" - While the F3 reader is capable of card swipes, all related information is relayed to the IDT field and the MSR field is not utilized.
9: "COIN1" - This indicates the pulse length registered when a coin is dropped into a drop connected to coin input #1 and increments the number of coins after the /.
@anonymousINLINE
Technician Information
The slash in the "Coin" text indicates the input.
"/" = Normally Open (Pins 5 & 6 at reader end)
"\" = Normally Closed (Pins 4 & 5 at reader end)
10:"COIN2"- This indicates the pulse length registered when a coin is dropped into a drop connected to coin input #2 and increments the number of coins after the /.
11: "NFC" - While the F3 reader is capable of NFC transactions, all related information is relayed to the IDT field and the NFC field is not utilized.
12: "IDT" - This indicates the current status of the internal EMV reader, from firmware/config downloads to transactions being performed.
Although indiscernible between the types of information being shown, information displayed in the IDT field while processes occur typically include an 'S' and a number that follows, indicating that activity is occurring.
The FasCard Diagnostics screen is displayed above and functions are outlined adjacent to the image. This screen is displayed when the 'Start Diagnostics' option is chosen in the card reader Diagnostics menu. To stop diagnostics, hold any point on the touchscreen until menu options appear. Select "Diagnostics Menu" and then select "Stop Diagnostics".