Overview
The Loyalty Accounts page is only accessible by users with Admin or Loyalty Account privileges. This page is used to add, edit, and delete Loyalty customer accounts. The functions on this page are designed for FasCard users and employees. Loyalty users may also access and edit their account information by logging into their account via mobile device.
On this
Pagepage
| Table of Contents | ||||||||||||
|---|---|---|---|---|---|---|---|---|---|---|---|---|
|
Managing Loyalty Accounts
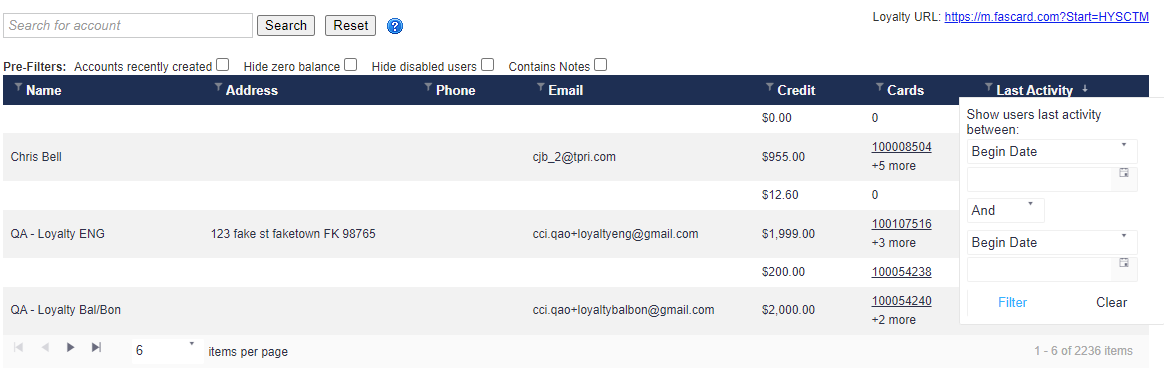
Navigating to the Loyalty Accounts page under the Loyalty Tab will display a sortable, filterable list of Loyalty Accounts present in the system.

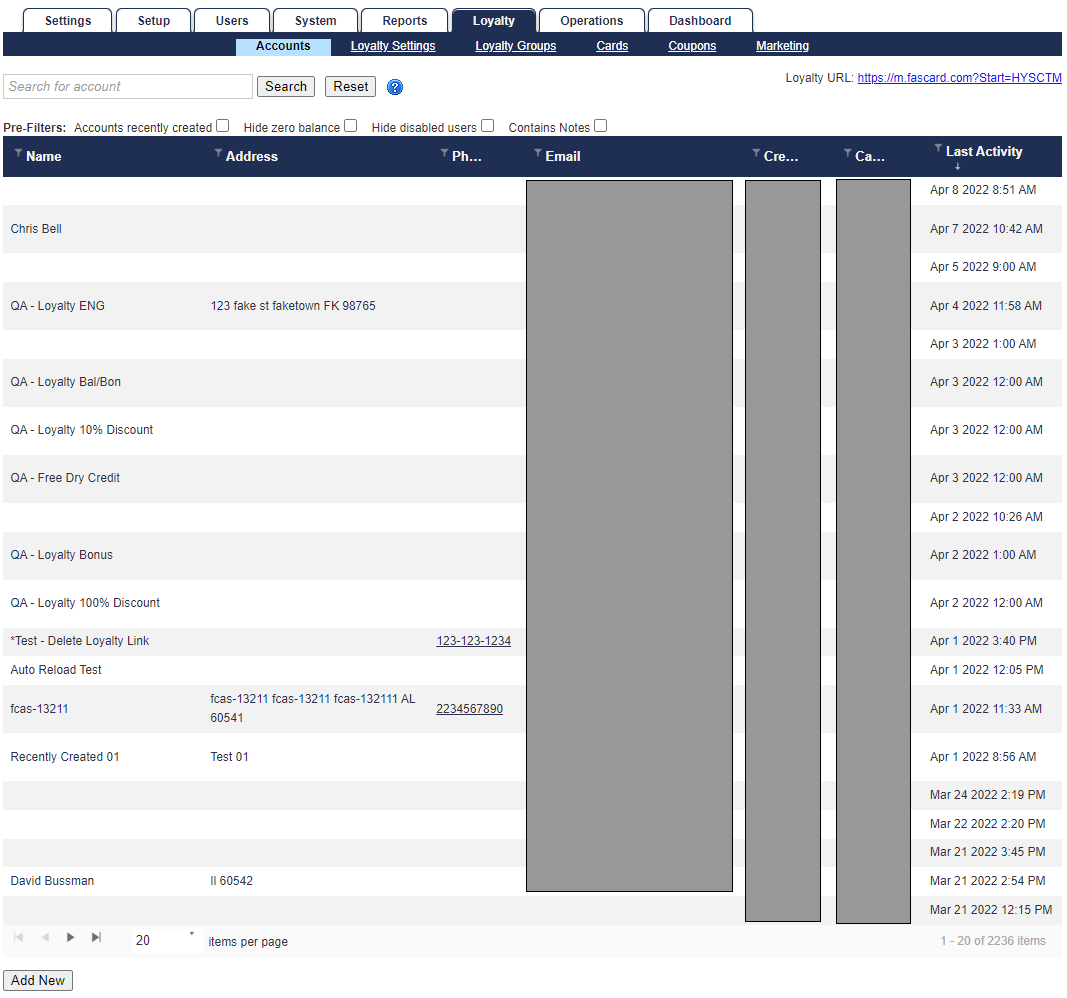
The Loyalty Account list allows you to sort accounts in any order, pre-filter any accounts based on whether an account was recently created, has no available balance, is disabled, or has a note stored to the account.
| Note |
|---|
Viewing the Full Loyalty Accounts Table To view the full, unfiltered table, uncheck the Accounts recently created box to display the Loyalty Accounts table in its original view. |
Searching & Pre-Filters

To search for an account, simply type known information in the Search for account field and select the Search button.
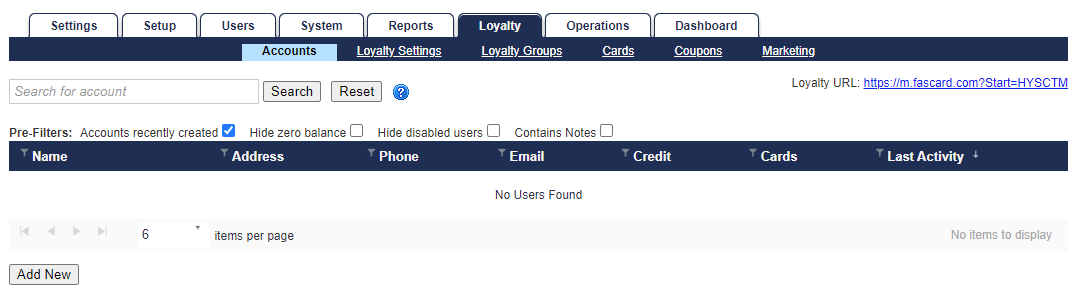
By default, when first clicking the Loyalty tab to display the default Accounts sub-tab, the checkbox for Accounts recently created will be enabled by default.
Pre-filters do not affect using the Search button to find a specific account from any information among any listed column.
After the Search button is used, you can, then, check-enable a pre-filter to better narrow search results.
With the default pre-filter active, accounts created on the current date of accessing the list will display. If no accounts were created today, the list will show No Users Found, requiring the Accounts recently created checkbox to be unchecked to display all all Loyalty accounts. Whether an account was recently created, has no available balance, is disabled, or has a note stored to the account, pre-filters can take any assortment of checkboxes enabled or disabled into account at any given time.
Sort & Filter
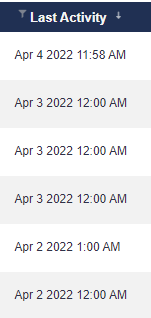
By default, the first sorted option when navigating to the Loyalty Accounts page is Last Activity in descending order, indicated by the down-arrow next to the Last Activity column.

Each column can be selected in any sort direction (ascending or descending) in any given priority based on how the user would want the list displayed at that specific time.
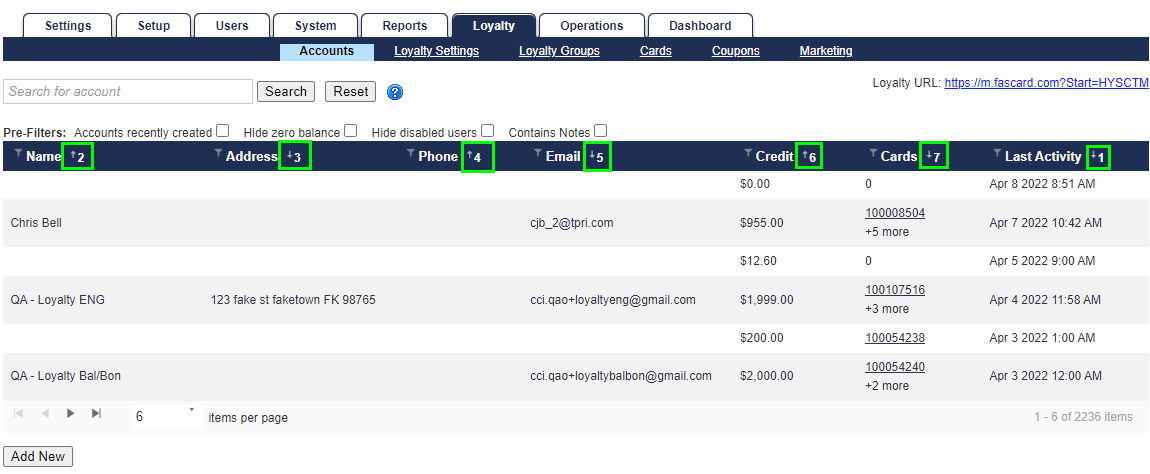

You can also filter columns based on any text-specific, number-specific, and/or date-specific guideline at the user's choosing by clicking any of the filter icons ![]() next to any of the column names.
next to any of the column names.

Note
When navigating away from the page, going back to the Loyalty Accounts page will reset any filters or sorts set.
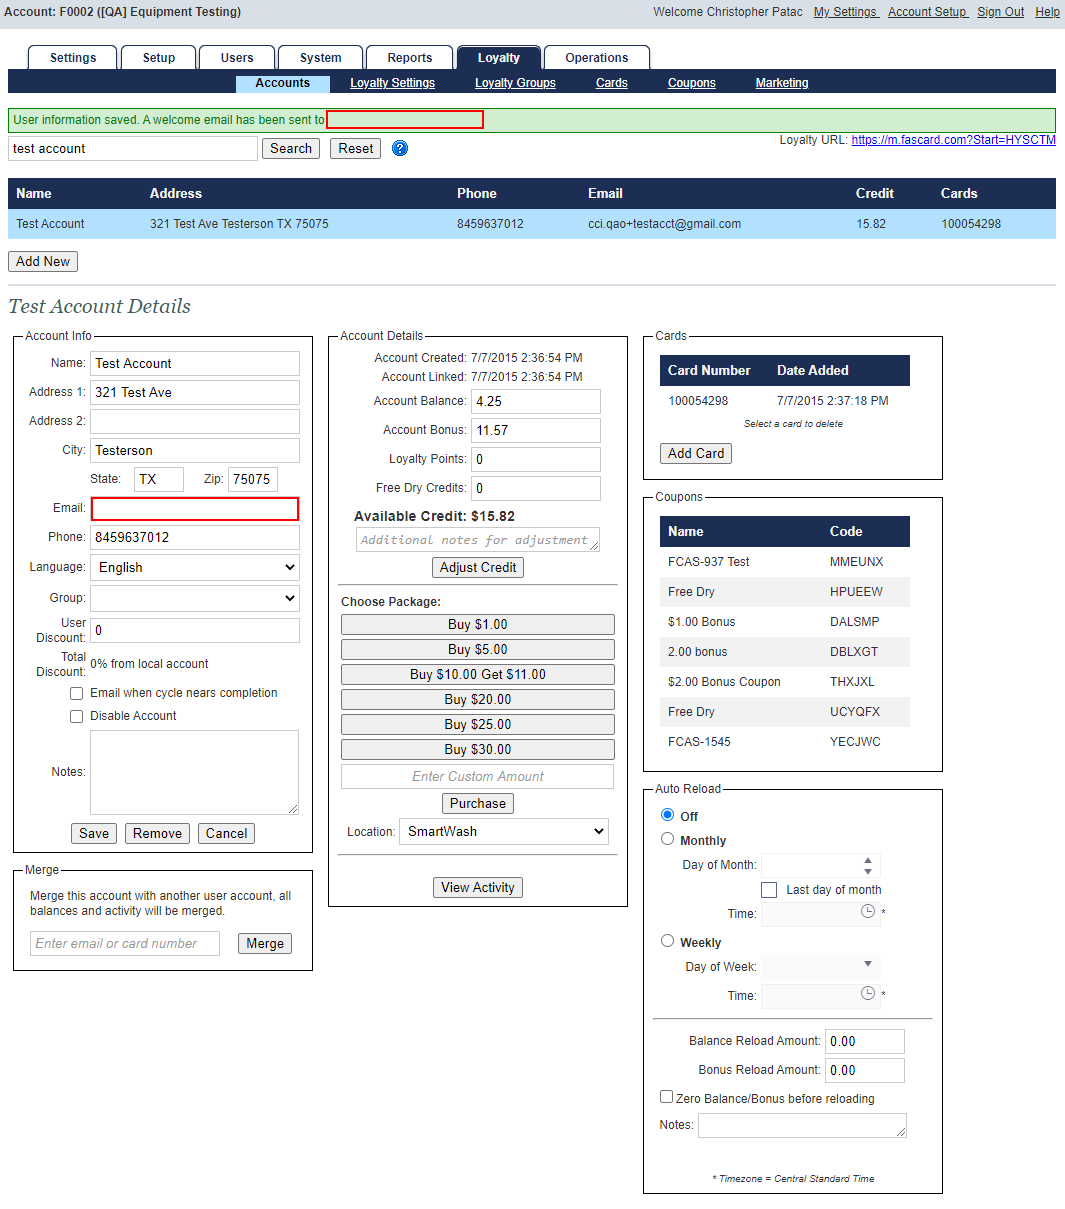
Displaying Account Details
Clicking anywhere on a user row will display the user details in the user details section of the page. Clicking the Add New button allows a new Loyalty Account to be added.
| Tip |
|---|
The Loyalty URL link (upper right of image shown above) is only visible when a "Join Loyalty Program" coupon is active. See FasCard Loyalty Site - Coupons for more information. |
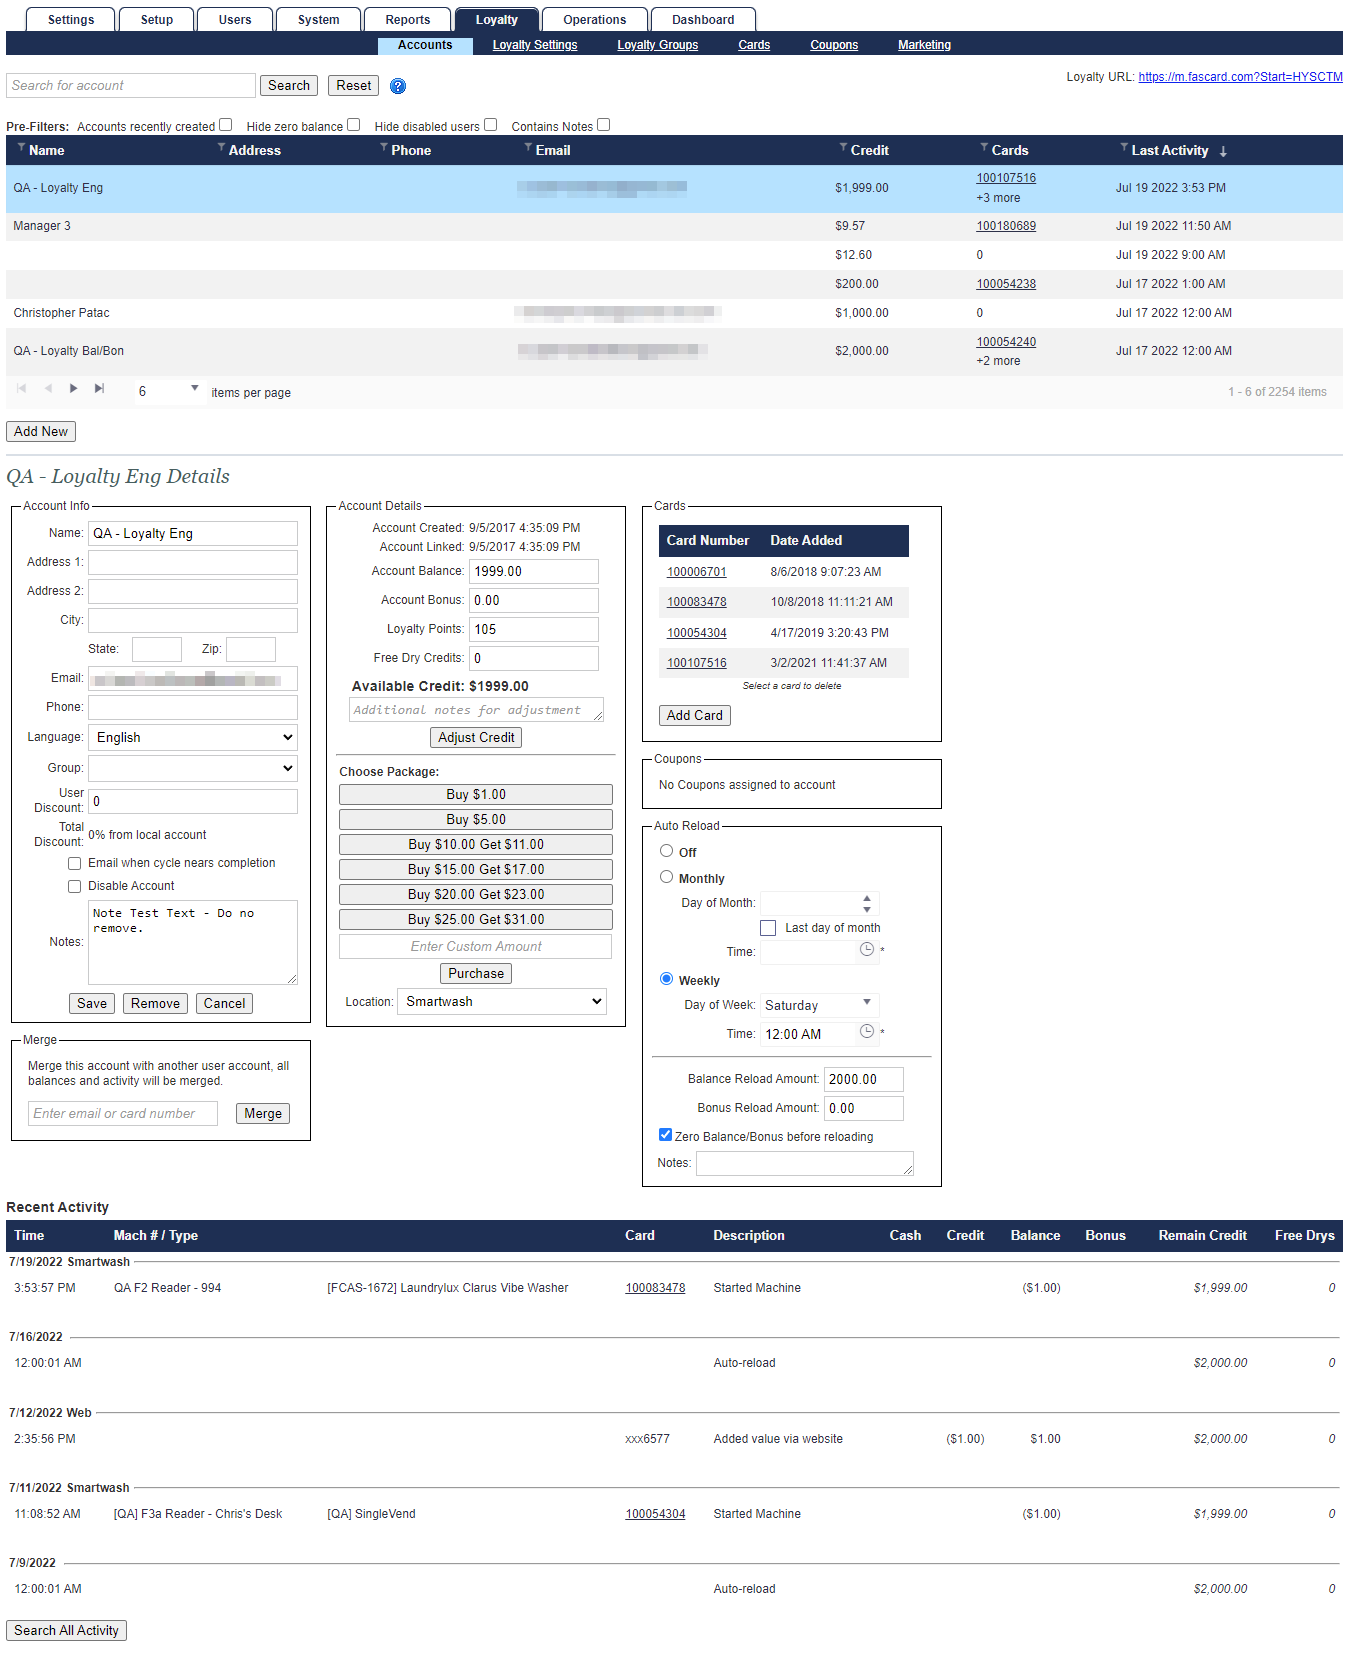

Loyalty Account Details
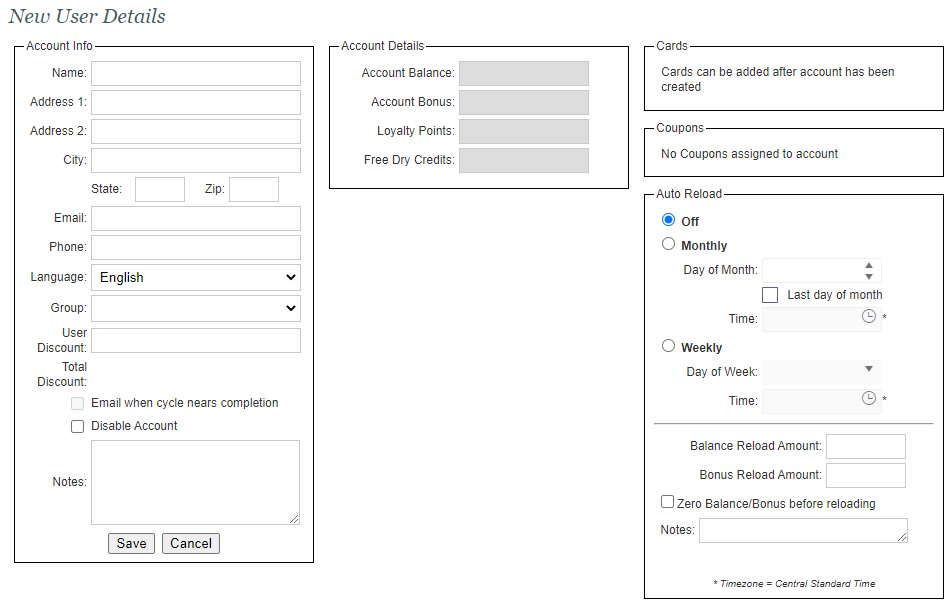
Once a Loyalty Account is selected or Add New is clicked, details for the account will be displayed. Account details are further broken down by section, below.
| Tip |
|---|
|
Account Info
| Panel | ||||||||
|---|---|---|---|---|---|---|---|---|
| ||||||||
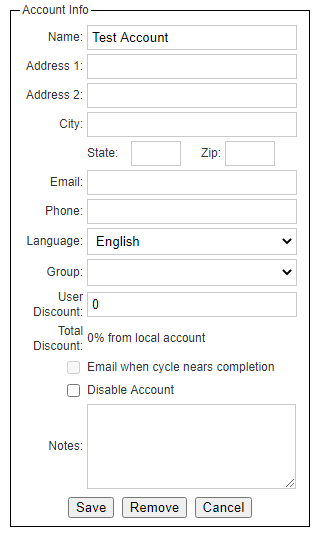
The account info section displays basic contact information for a selected user.
|

|
Account Details
| Panel | ||||||||
|---|---|---|---|---|---|---|---|---|
| ||||||||
The account details section displays account balance information.
|
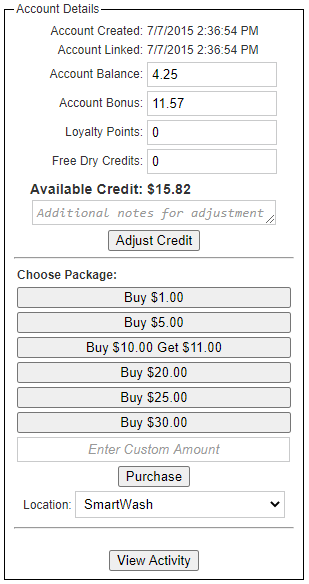
Choose Package This section allows users with the requisite privileges to add value to an account on the behalf of the customer. To add value to an account using this function, follow the steps listed below.
|

Recent Activity
| Panel | ||||||||
|---|---|---|---|---|---|---|---|---|
| ||||||||
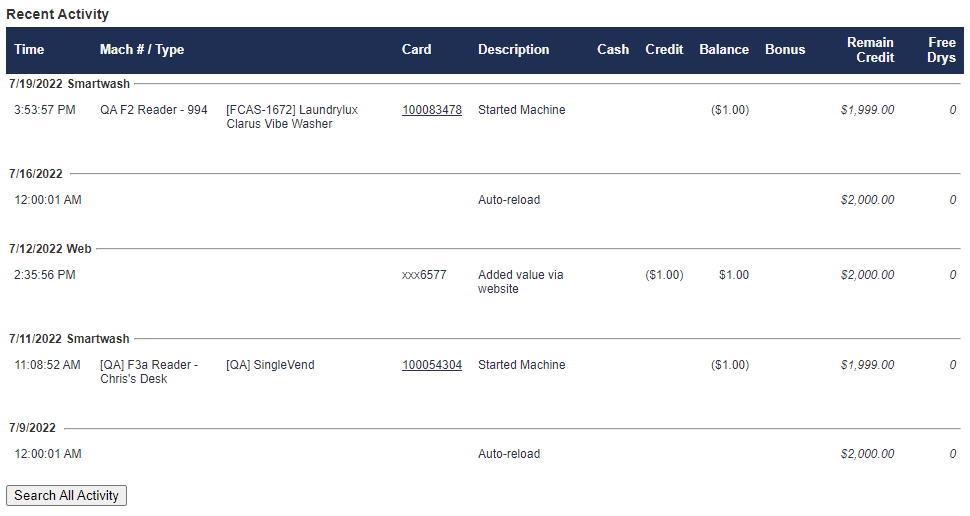
The Recent Activity section displays the last five (5) actions performed on an individual's loyalty account.
|
|

Cards
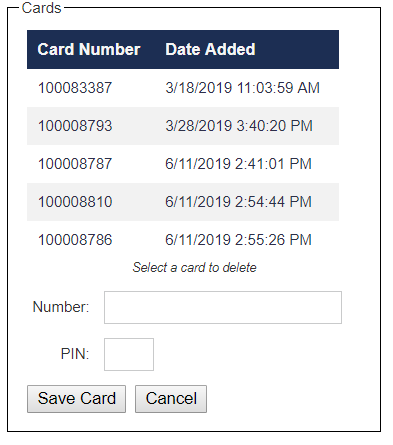
The cards section displays the cards that have been associated with the account. An account may have multiple cards associated with it.
| Panel | ||||||||
|---|---|---|---|---|---|---|---|---|
| ||||||||
When you click "Add New Card", the below fields will appear and need to be completed. |
Follow the steps in the 'Edit a Loyalty Account' section, below.
|
| Panel | ||||||||
|---|---|---|---|---|---|---|---|---|
| ||||||||
When you select a card by clicking its card number row, the 'Delete Card' option becomes available. Once the 'Delete Card' option is used, the card number selected is removed from the Loyalty account and would be available for reuse for dispensing or adding to a new or existing account. 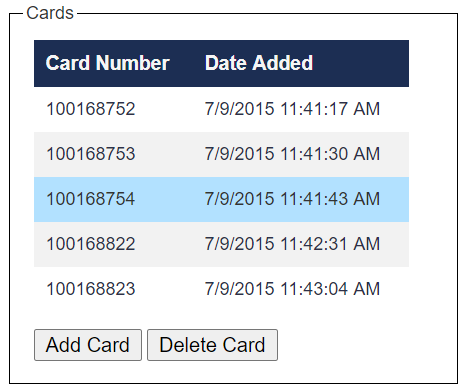 |
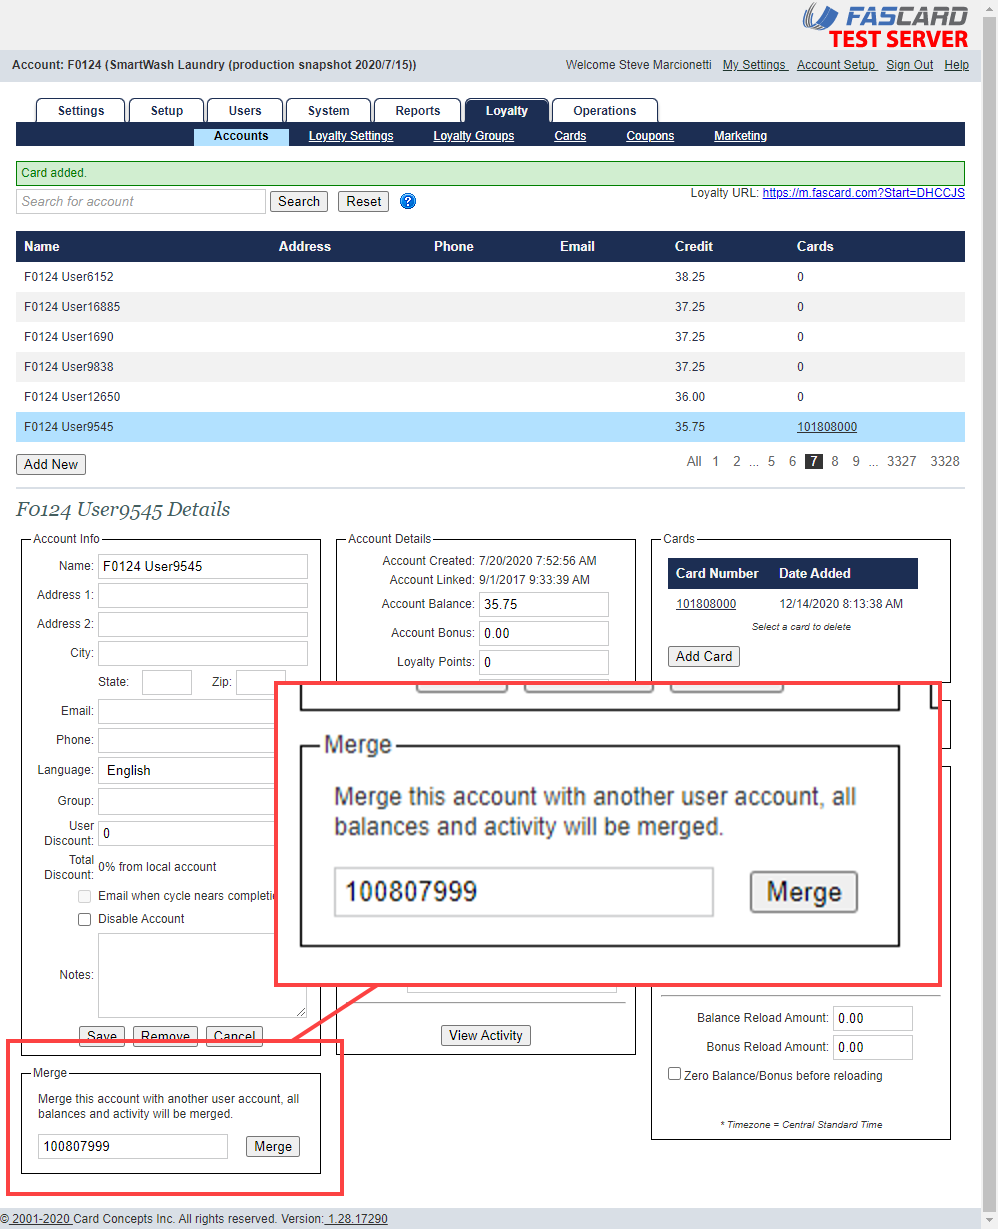
Merge
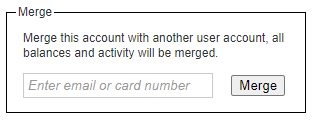
The Merge section allows the active account to be merged with another. When merging accounts, all of the account balances, cards, and account activity are merged together.
Merging two accounts together is determined by whether there is a "mergeability" between the source and destination account.
For instance, the easiest tell would be if the email address field on the source account is blank but has a card number assigned and the destination account has an email address visible whether a card number exists or not. This is because the email field only populates if registration for the loyalty user is completed, indicating the account has been verified.
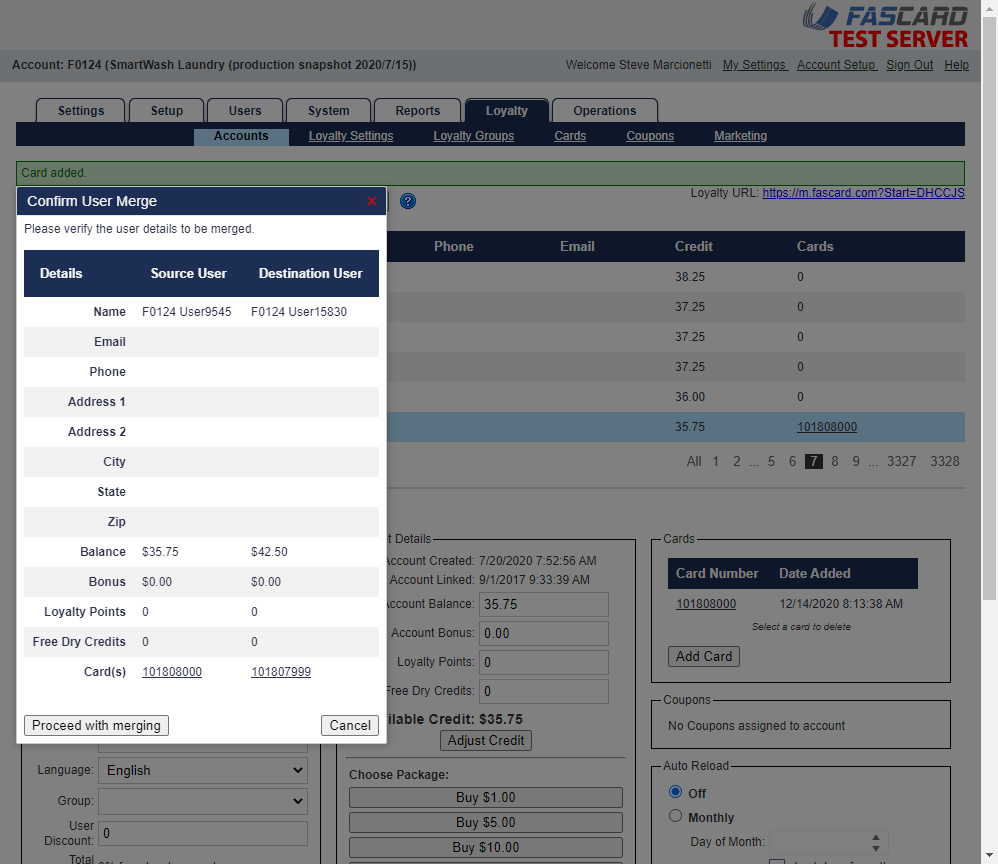
| Note |
|---|
Only the email address of the target account is retained. The source email address is dropped. |
| Panel | ||||||||
|---|---|---|---|---|---|---|---|---|
| ||||||||
When you click "Add New Card", the below fields will appear and need to be completed. |
Follow the steps in the 'Edit a Loyalty Account' section, below.
|
Merging Loyalty Accounts
| Panel | ||||||||
|---|---|---|---|---|---|---|---|---|
| ||||||||
|

|
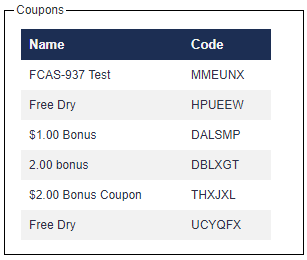
Coupons
| Panel | ||||||||
|---|---|---|---|---|---|---|---|---|
| ||||||||
This section displays any coupons that have been applied to the account utilizing the FasCard Loyalty Site & Mobile App. This is strictly a historical record and nothing can be edited in this section.
|
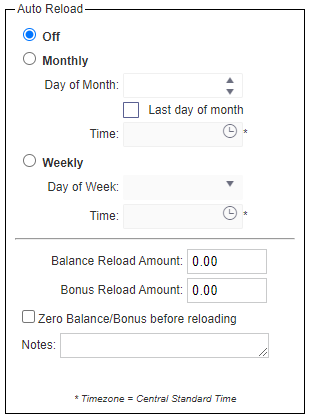
Auto Reload
| Panel | ||||||||||||||||||
|---|---|---|---|---|---|---|---|---|---|---|---|---|---|---|---|---|---|---|
| ||||||||||||||||||
This section allows users with the requisite privileges to configure an automatic value reload for the selected Loyalty account. To configure an Auto Reload, select from the following options:
|
Add or Edit a Loyalty Account
| Panel | ||||||||
|---|---|---|---|---|---|---|---|---|
| ||||||||
When adding a Loyalty account, only an email address at minimum is needed to be able to begin the registration process of an account for FasCard Loyalty Site & Mobile Appaccess. Should an email not be entered at present, an email can always be entered later so long as the loyalty user has not already created an account through the FasCard Loyalty Site or Mobile App.
|
Email Registration Sequence
Once an email is entered, whether immediately or at a later time, the loyalty user will receive a notification in their email to complete the registration process.
The email will include a link to the mobile site to create a password and register their FasCard account.
Click the provided link or navigate to https://m.fascard.com from a desktop or mobile device.
Select the 'Forgot Your Password?' link and enter your email.

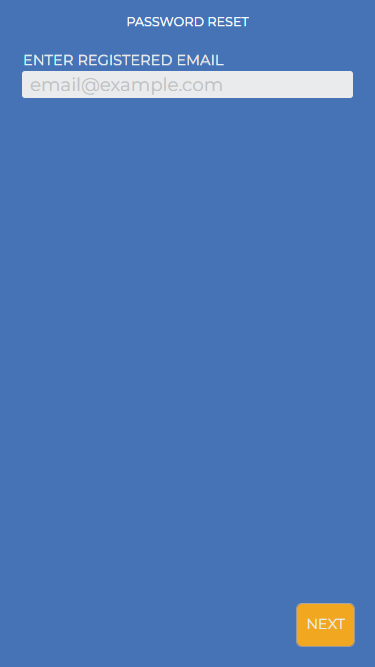
Once entered, you will receive an email with a six (6) digit code for verification. This code will be valid for up to one (1) hour even if you re-enter your email address in the .On the page that follows after entering an email, you will need to enter the six (6) digit code and click NEXT.


Once verified, create a password on the Set Password page that follows.
Passwords must be a minimum eight (8) characters in length and include one uppercase letter, one lowercase letter, and one number.
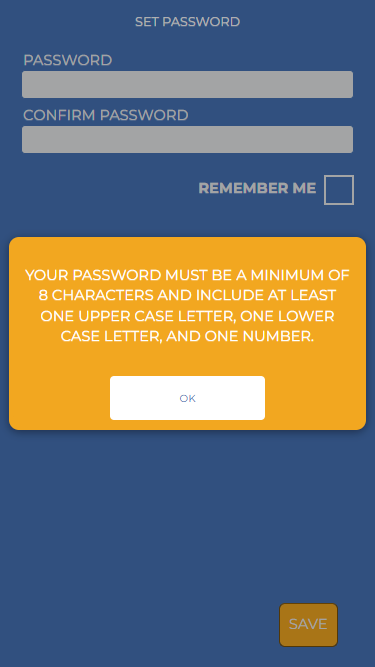

Once entered, select the Save button to complete registration.
Edit a Loyalty Account
| Anchor | ||||
|---|---|---|---|---|
|
| Panel | ||||||||
|---|---|---|---|---|---|---|---|---|
| ||||||||
Loyalty account information can be edited by searching for or selecting the desired account and altering the appropriate fields.
|
Disable a Loyalty Account
| Panel | ||||||||
|---|---|---|---|---|---|---|---|---|
| ||||||||
Loyalty Accounts can be disabled but not deleted. To disable a Loyalty Account, navigate to the FasCard Admin site and sign in with an Admin or Loyalty Accounts user account and follow the steps below.
|
| Hide if | ||
|---|---|---|
| ||
CCI Technician Information
|