Lite System Hard Drive Replacement
Lite System Hard Drive Replacement
Failure to successfully complete the following steps prior to rebooting can lead to data loss!
Card Concepts Inc takes no responsibility for data loss due to human error, hardware failure, or other such circumstances.
Purpose
In case a hard drive fails you will need to replace it. This guide will show you how to open the lite system up and replace the drive.
Requirements
- Lite System
- 2.5 SATA Hard Drive or 2.5 SATA Solid State Drive
- Small Phillips Head Screw Driver
Instructions
Unplug the AC power cord and detach the other cables from the system. For safety reasons, remove the plug for the power cord from the electrical outlet, and then detach the other cables.
Also it is important to properly ground yourself prior to working on the computer. A static shock can damage your computer!
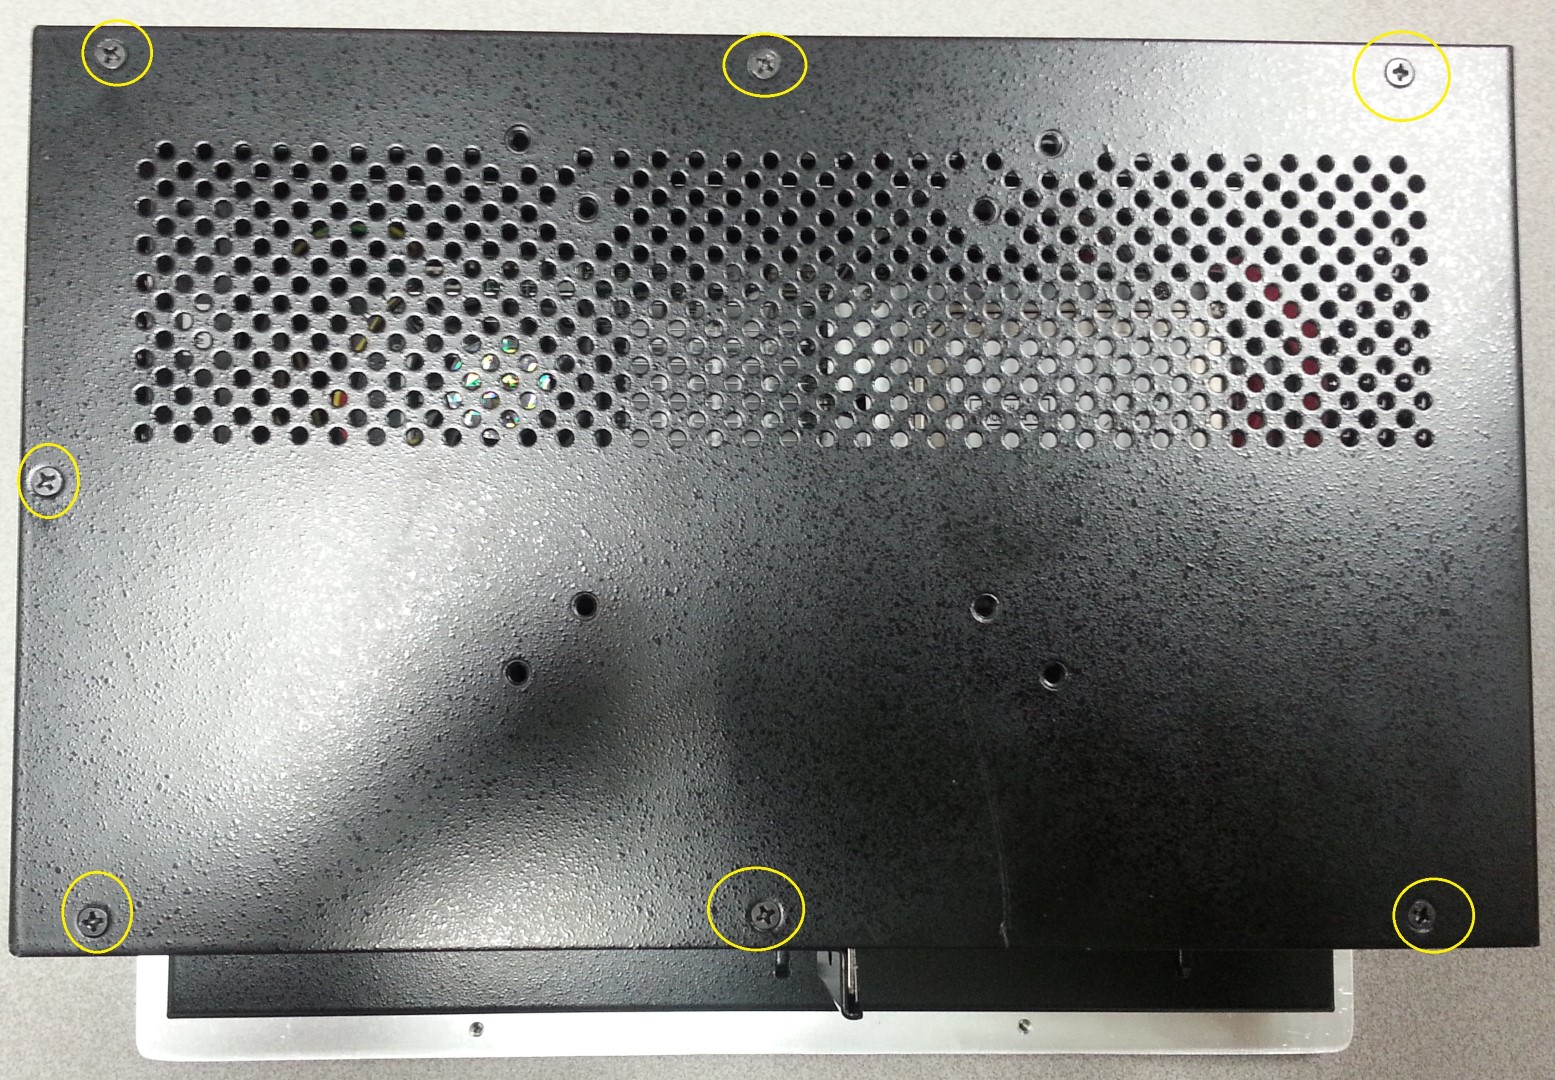
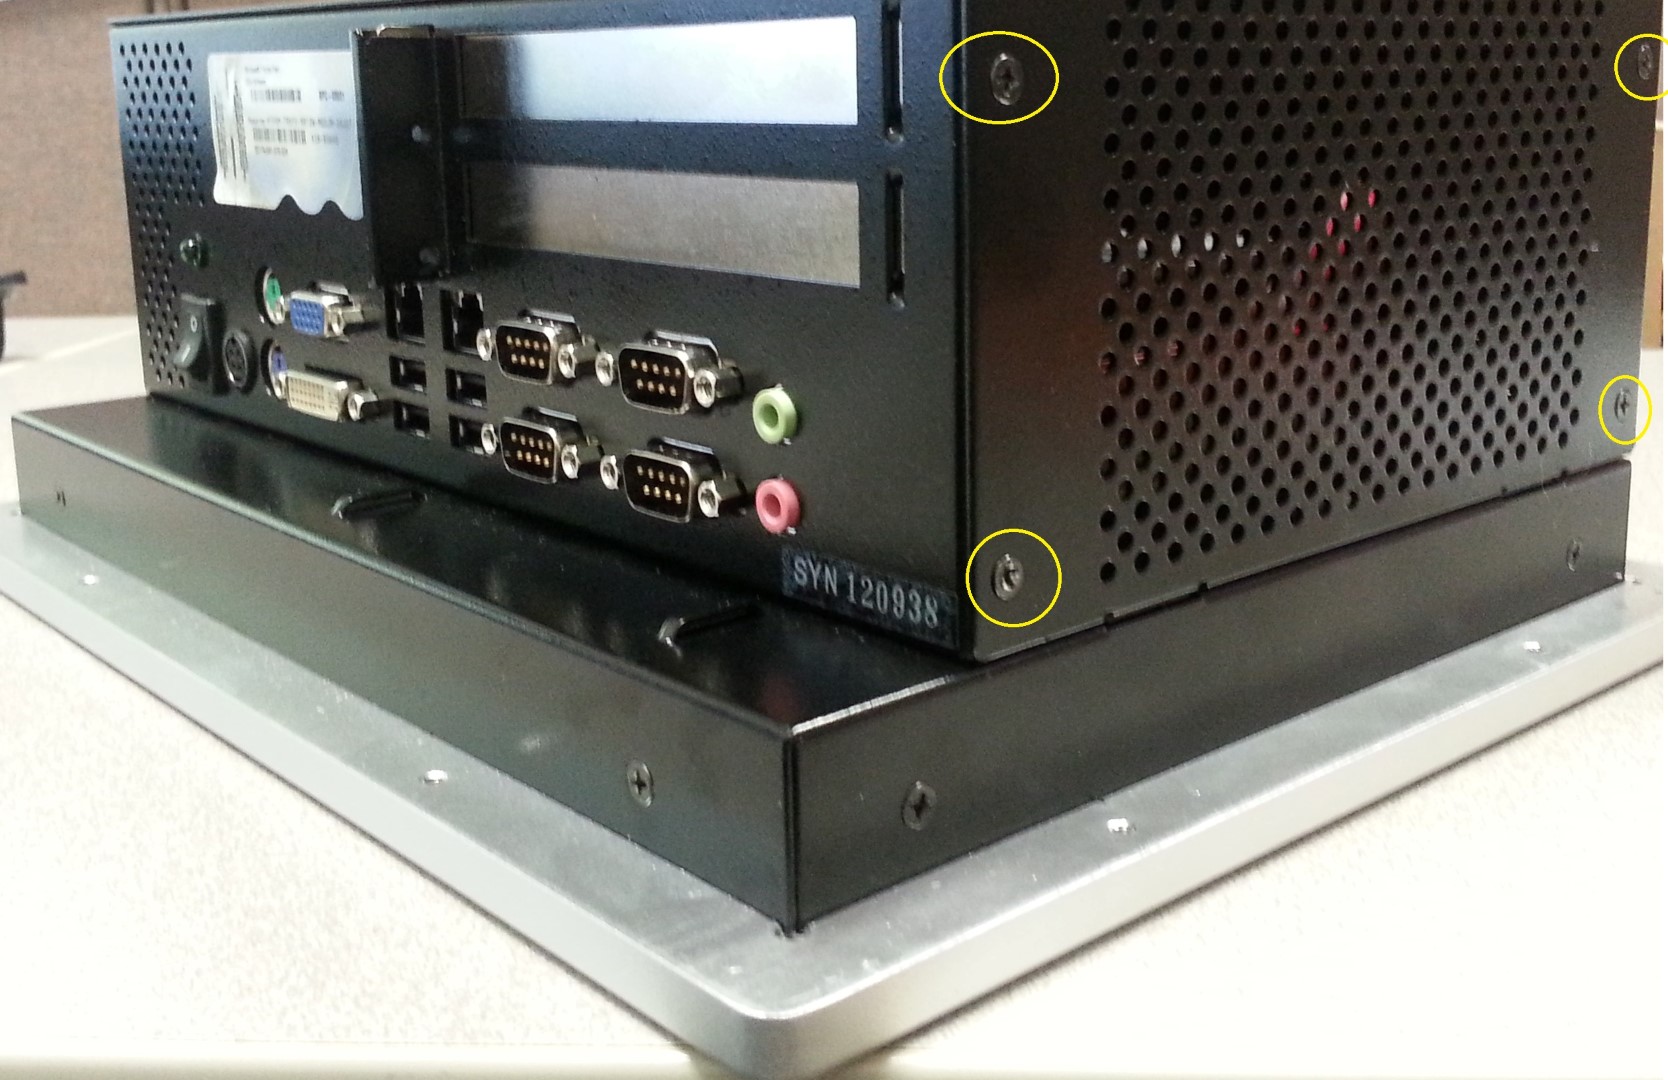
You will need to remove the 7 screws in back of the lite system.
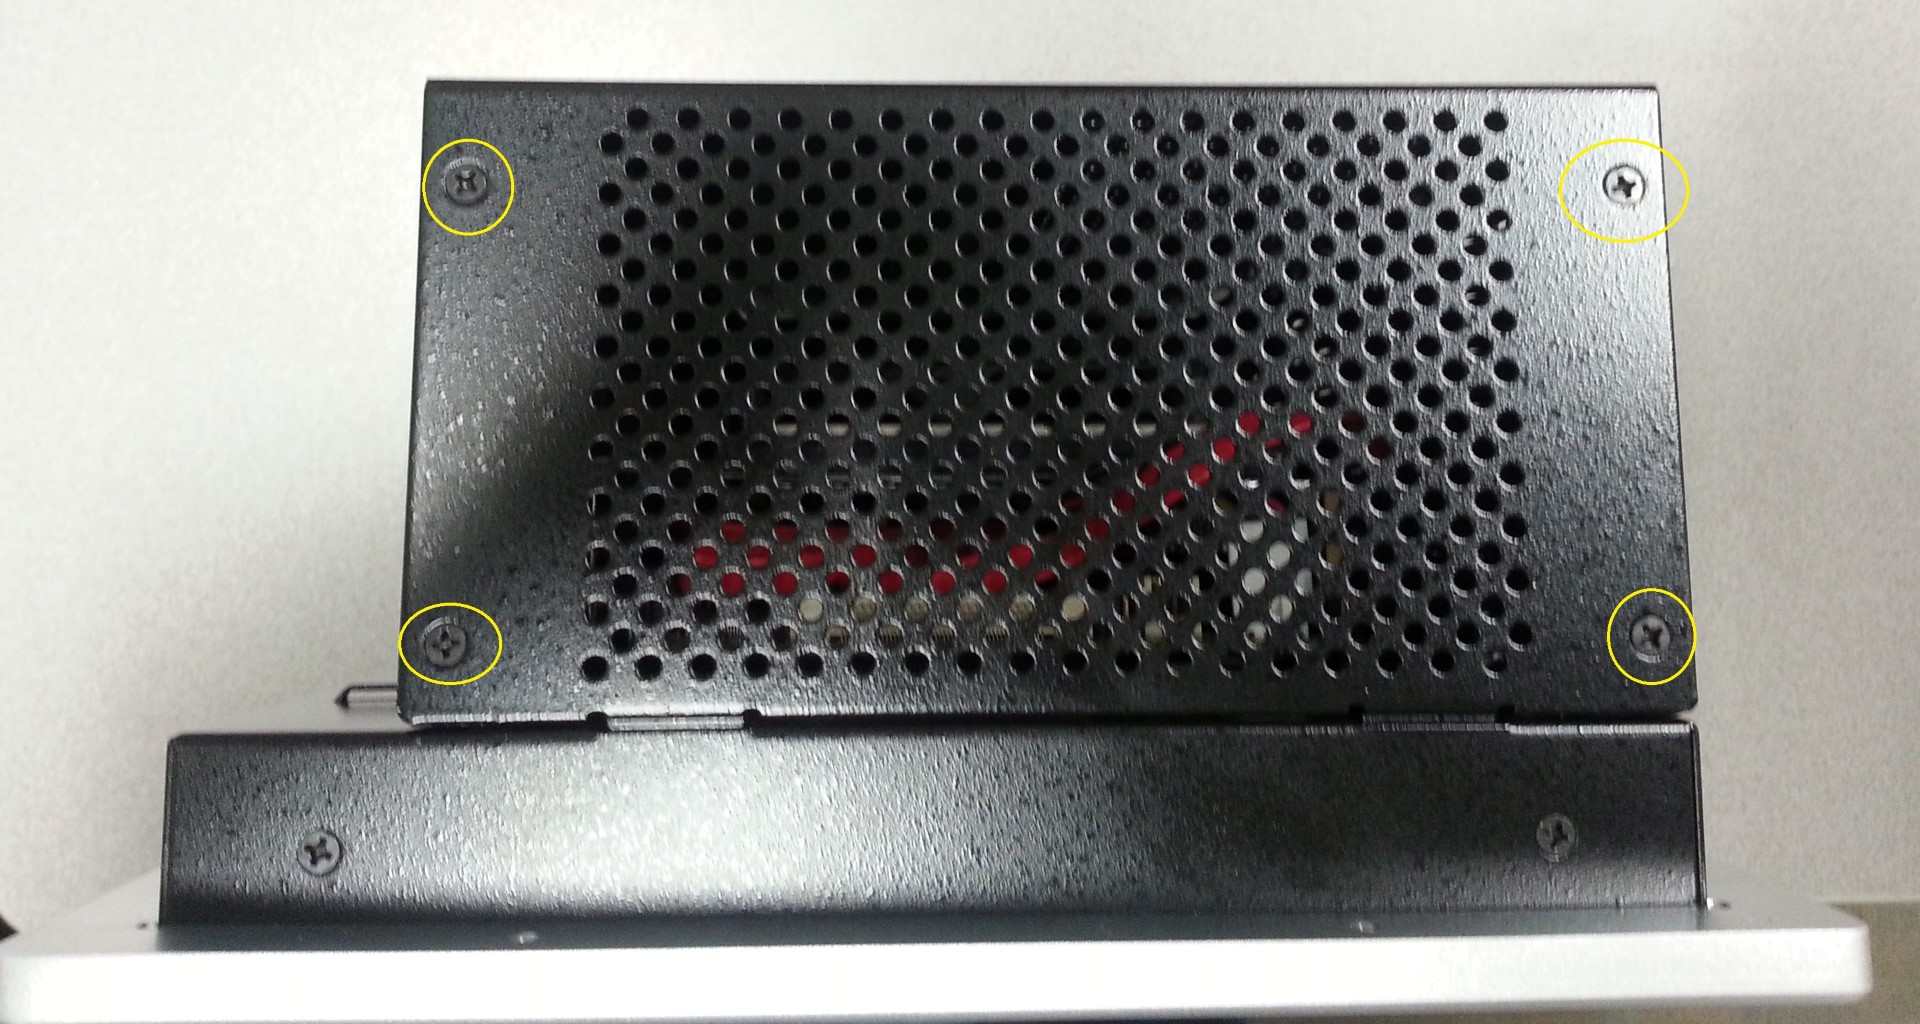
- Remove the 4 screws from the right side of the lite system
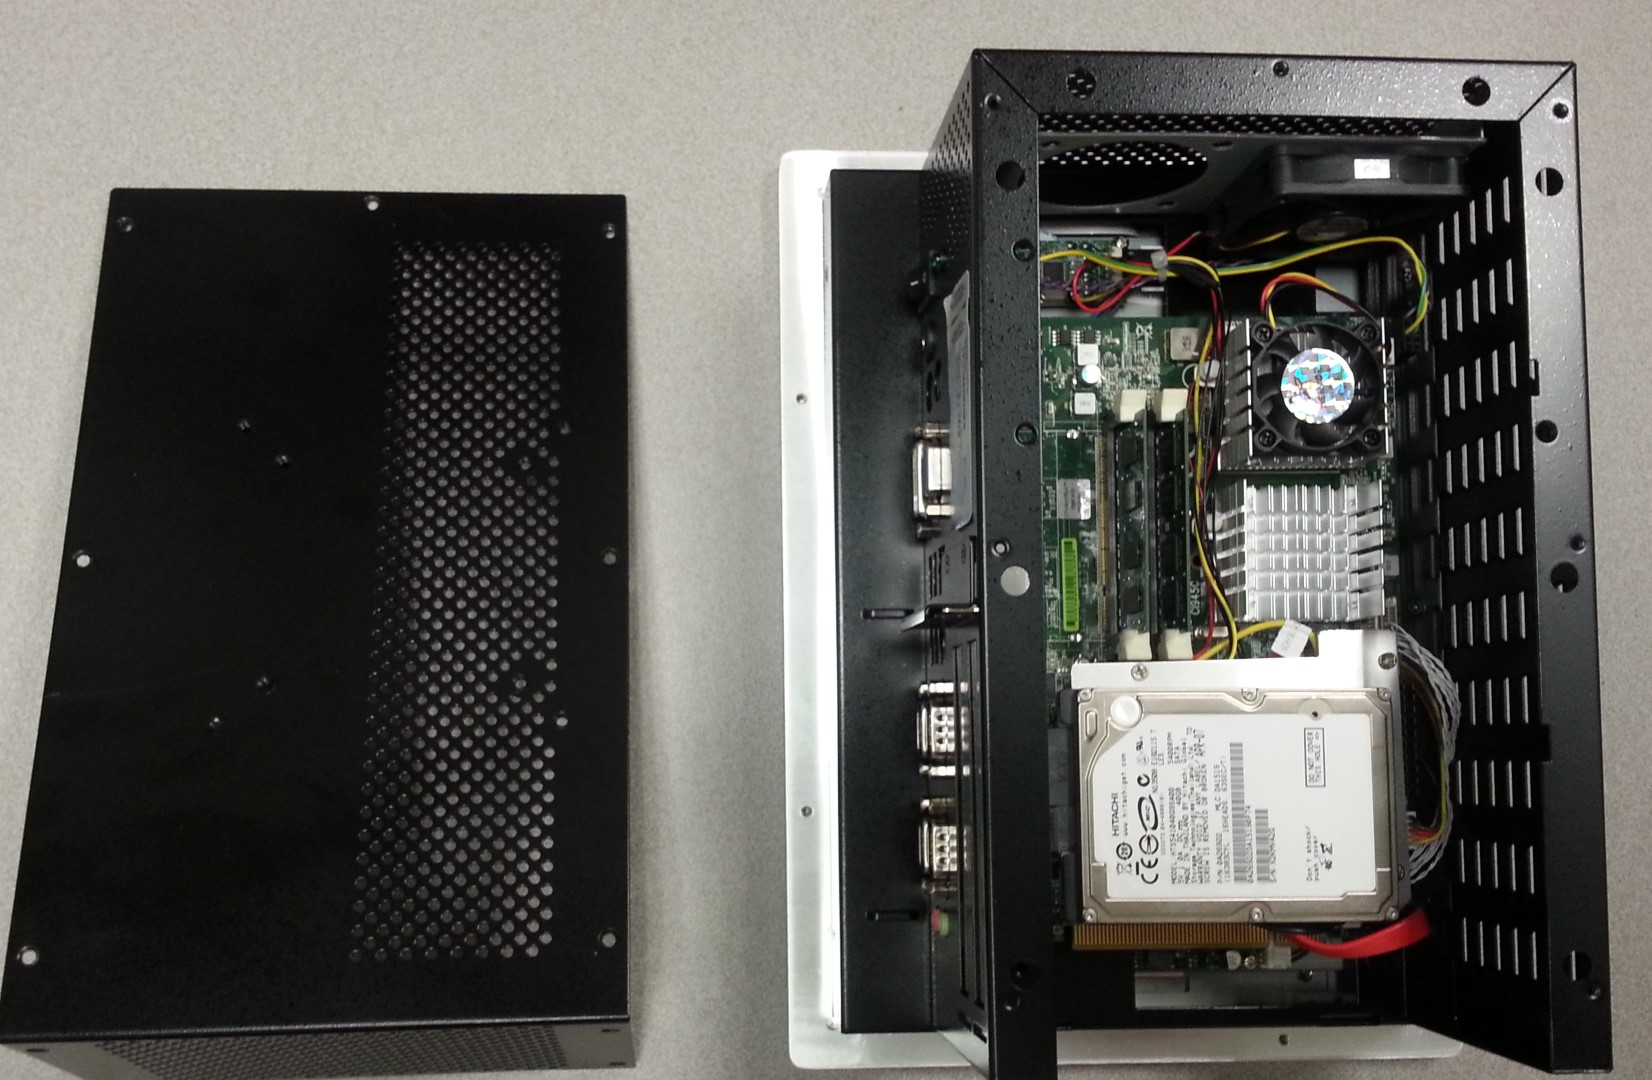
- Remove the cover and it should look like this. Take this time to also clean the cooling fans on the computer as well as inspect for blown capacitors. See: Dell Computer Preventive Maintenance
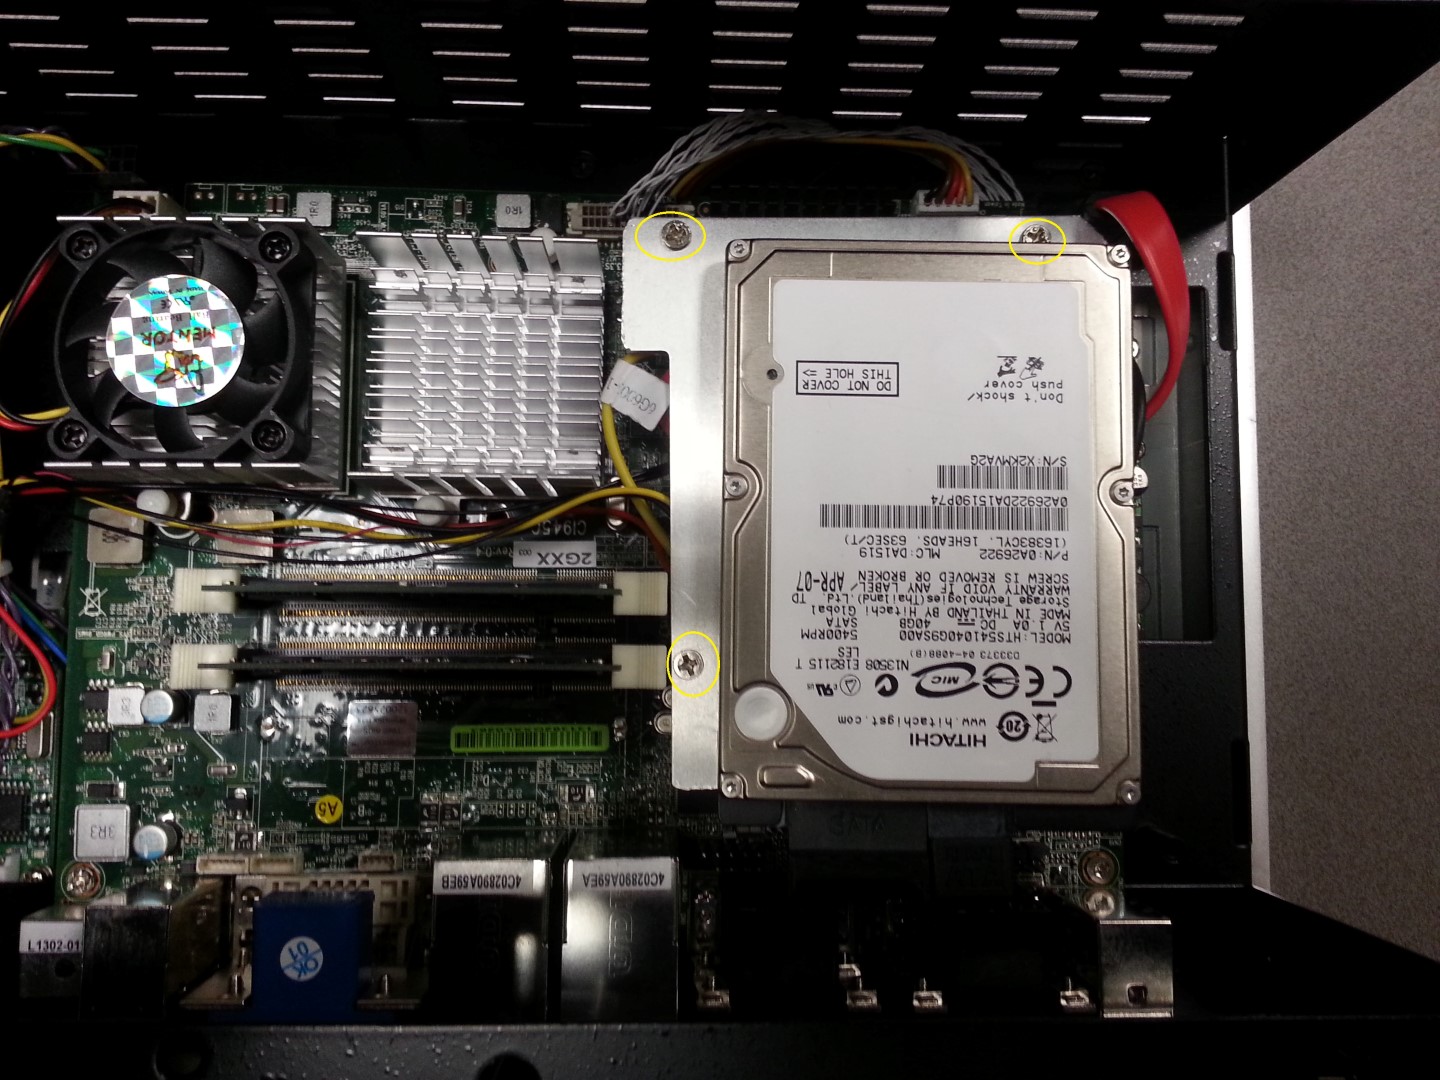
- We are now going to remove the hard drive. Remove the three screws from the silver plate of the drive.
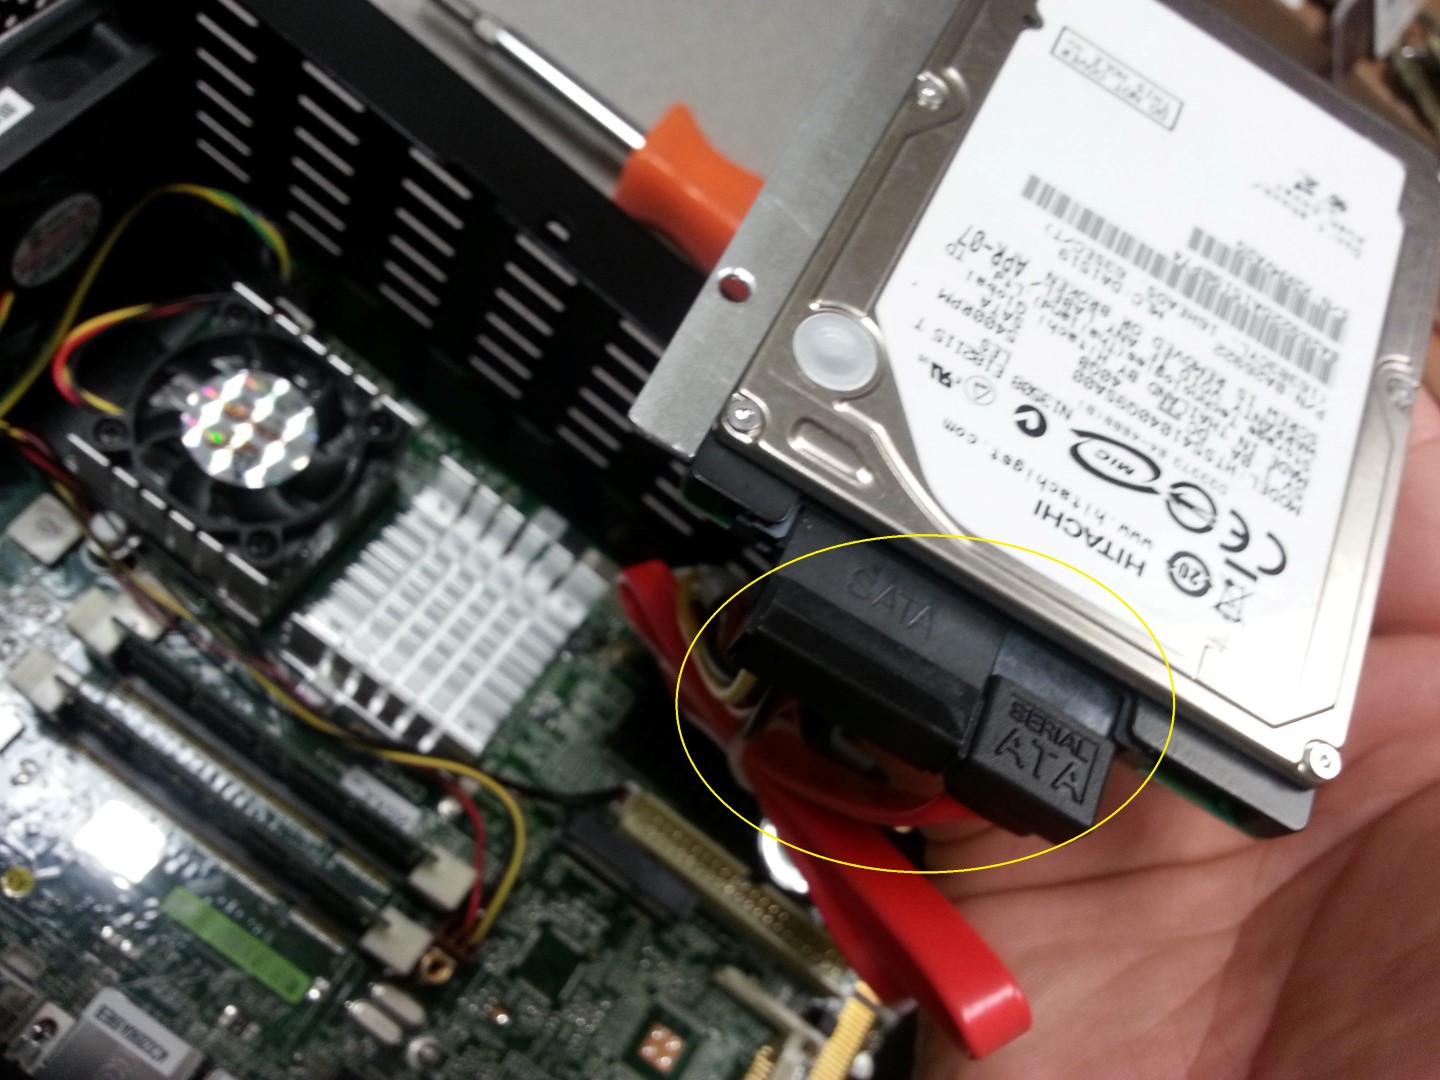
- Remove the SATA cable and Serial ATA cable
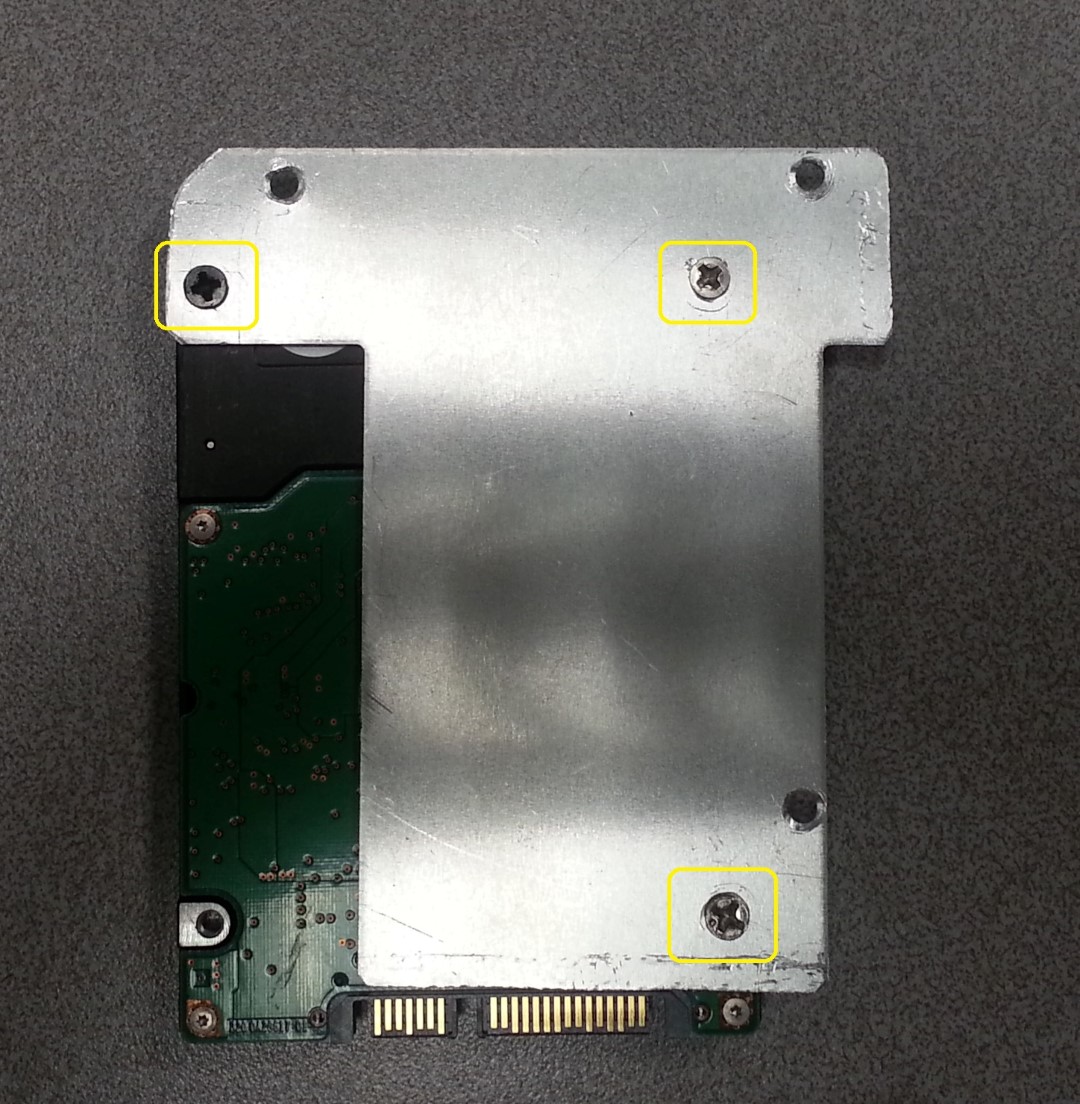
- We are now going to remove the hard drive from the silver mounting plate. Remove the 3 screws from underneath the silver plate that is holding the drive.
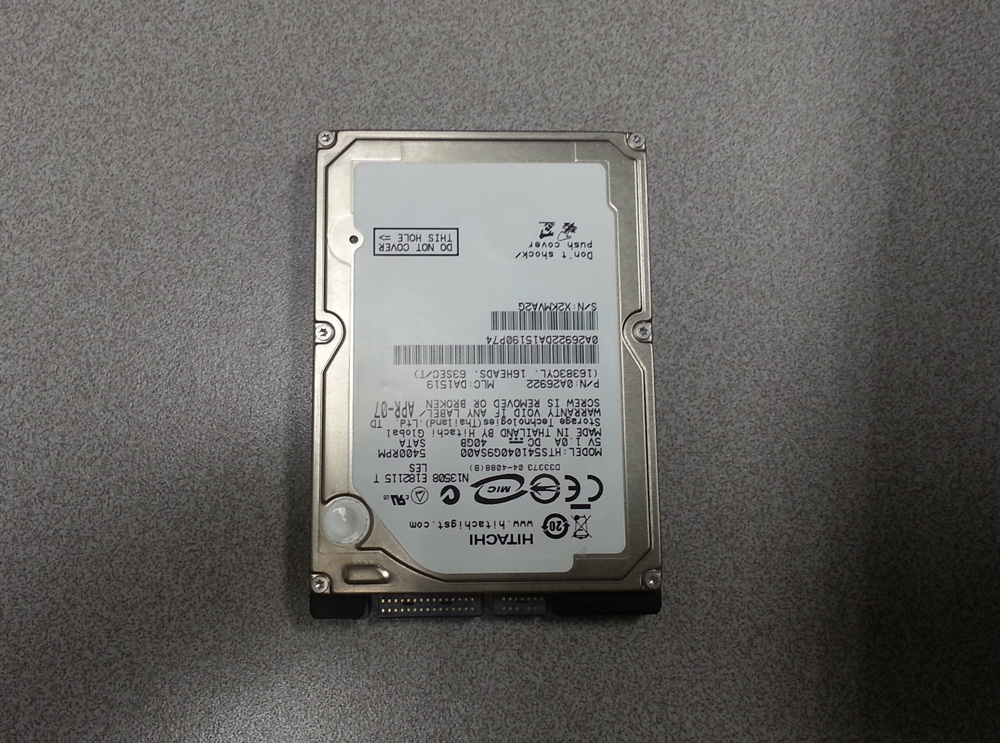
- After the last step has been performed you now have completely removed the hard drive from the panel PC. The hard drive should look like this.
Tips & Warnings
- Make sure when taking the screws out to put them on a secure place so they do not get lost.
, multiple selections available, Use left or right arrow keys to navigate selected items
