C-5821 Pyramid APEX Bill Note Acceptor (BNA) and LaundryCard
- Christopher Patac
- Adam Arafat
The C-5821 Pyramid APEX Bill Note Acceptor (BNA) is an additional available option for Bill Note Acceptor models to use with LaundryCard X-Changers. This detailed guide discusses its properties, installation, and configuration of the device.
NOTE
The C-5821 Pyramid APEX Bill Note Acceptor requires LaundryCard v9.1.4+ updated Configure Hardware tool to function.
| Part ID | Description | Image |
|---|---|---|
| C-5821 | Bill Note Acceptor (BNA) Pyramid APEX 7400-U13-USA |

|
Features
The Pyramid APEX Bill Note Acceptor (BNA) is compatible with all V2 LaundryCard X-Changers. Mounting and installation is similar to its counterpart, the C-5820 MEI BNA.
Key Differences
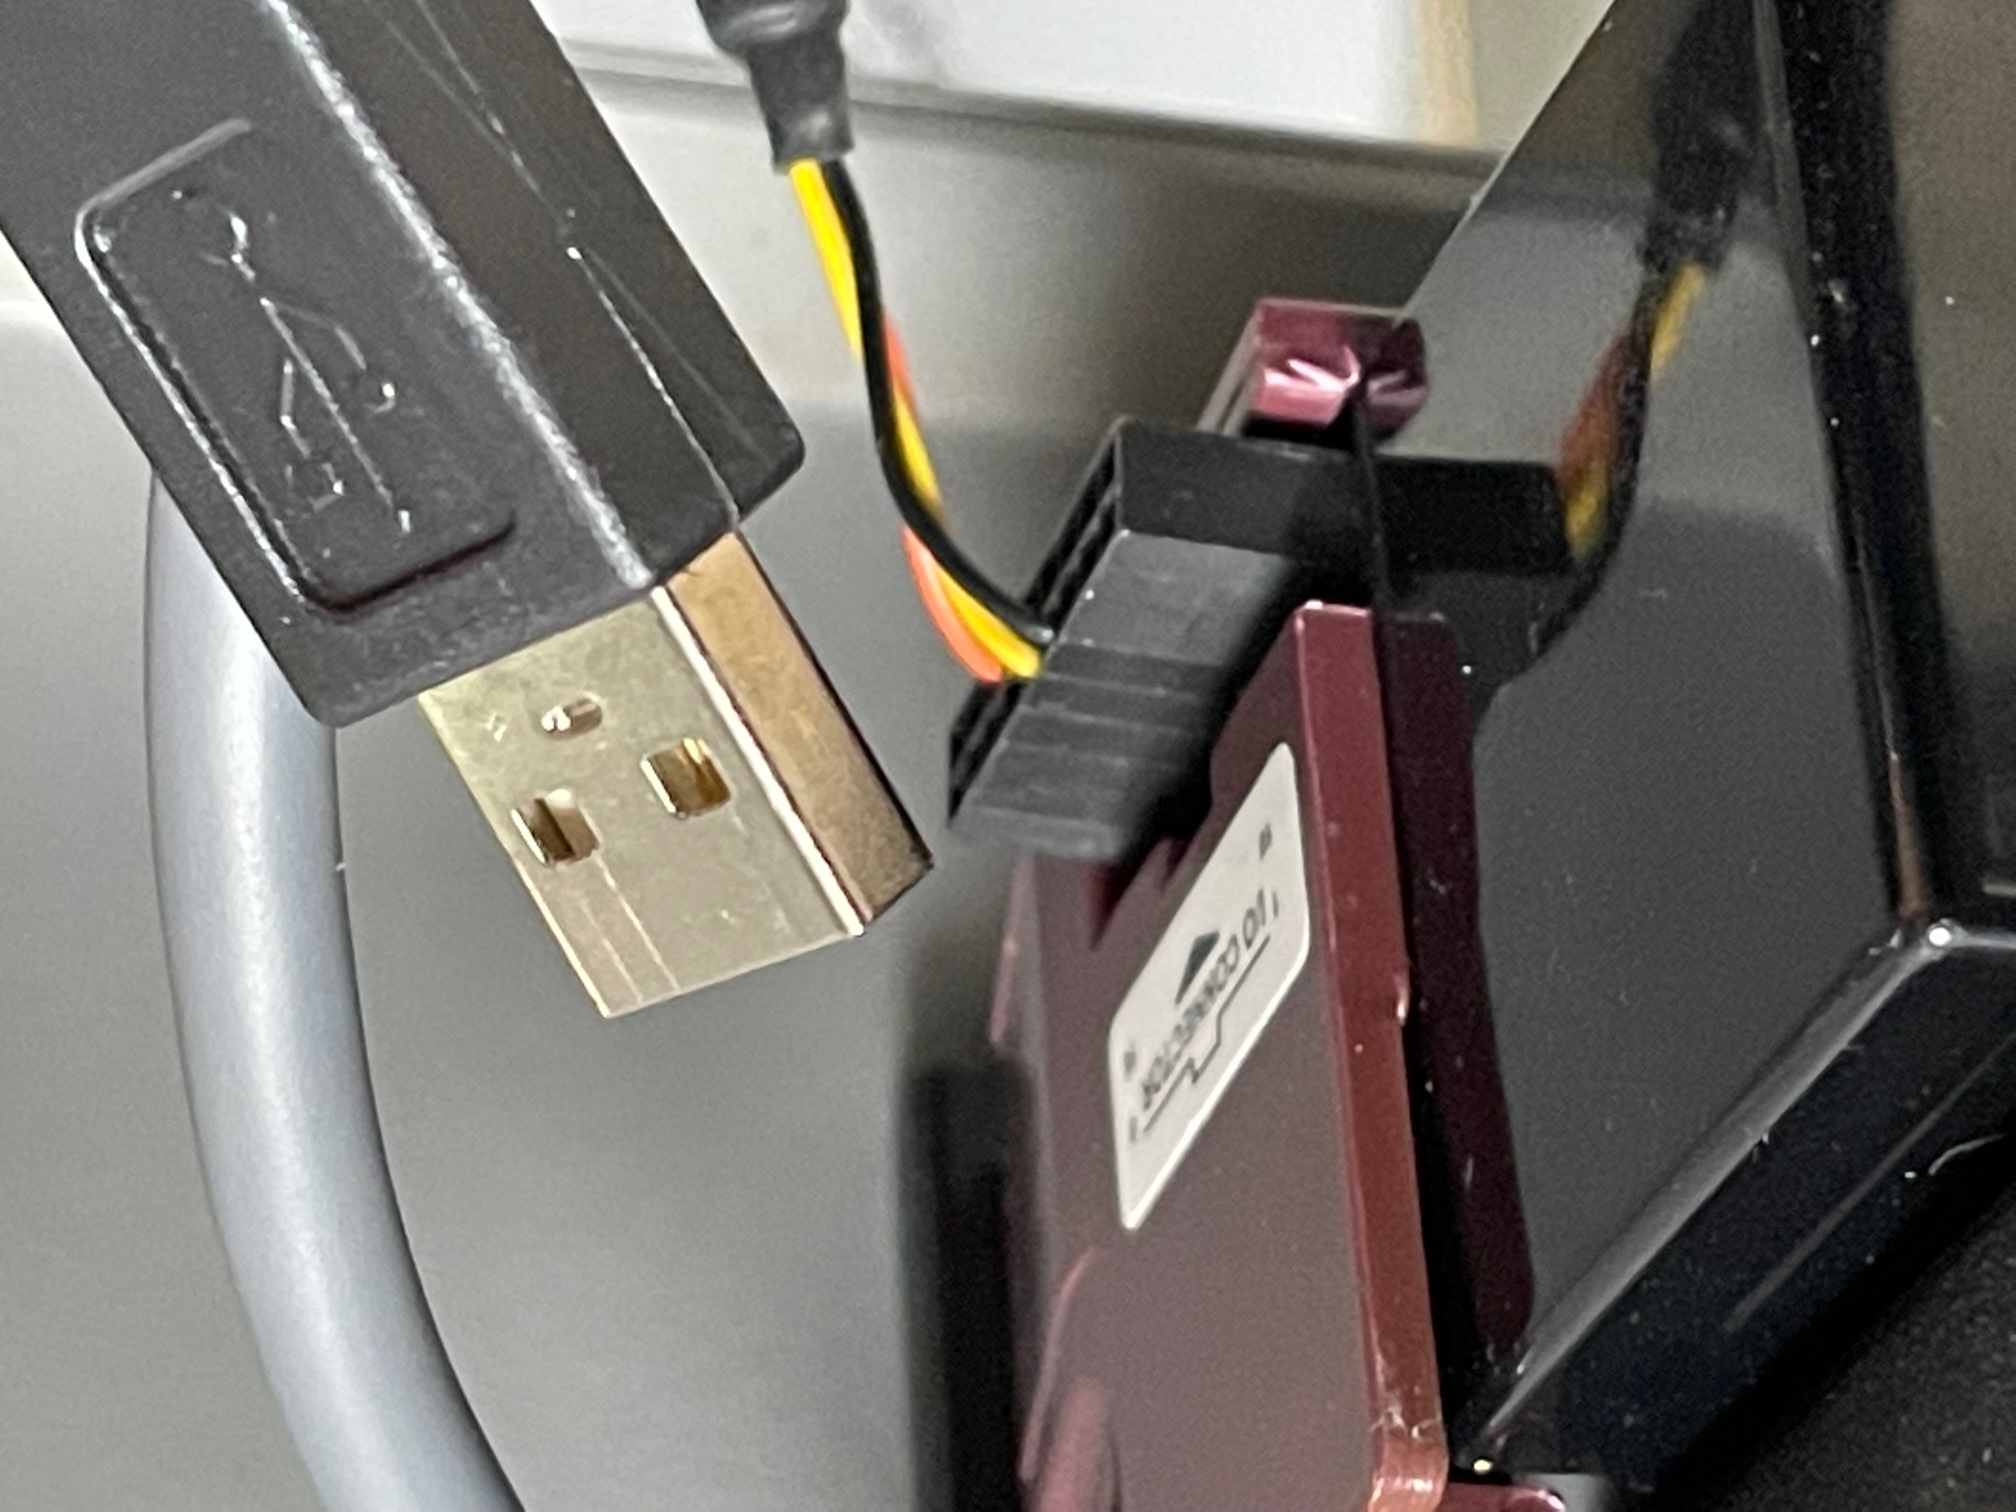
- The Pyramid BNA, when in use with an X-Changer, uses a Serial-to-USB cable that feeds into the 18-pin connector on the side of the BNA.

- As such, the bill acceptor must be configured to RS232 mode to accept and communicate using this connection.
- As such, the bill acceptor must be configured to RS232 mode to accept and communicate using this connection.
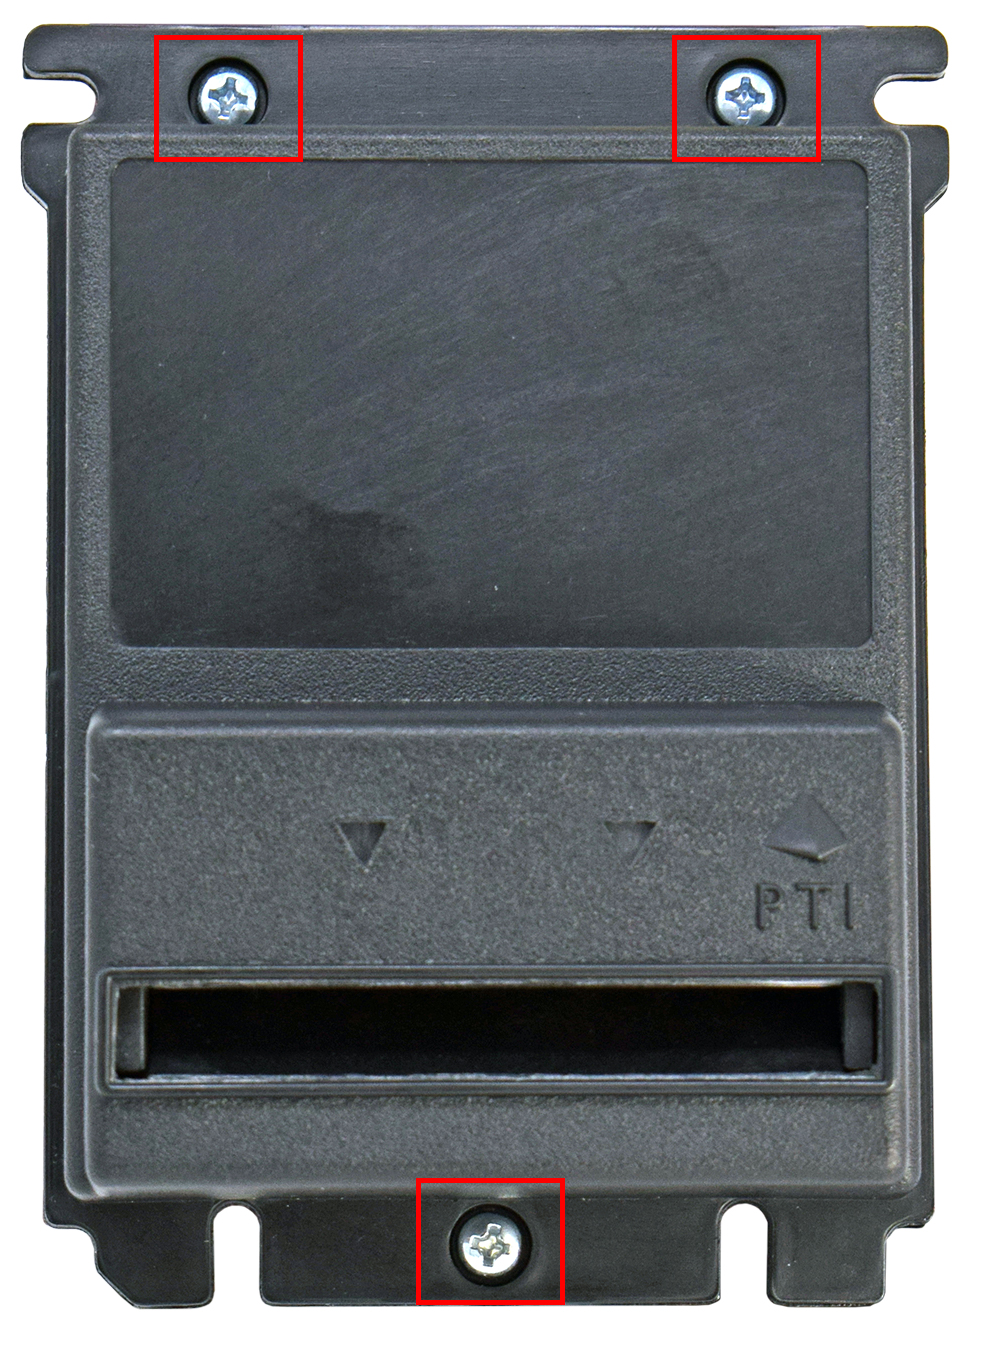
The Pyramid BNA front bezel mounting holes are secured from three (3) points: two on the top face and one bottom-center with the screw holes positioned differently from a standard MEI bezel.
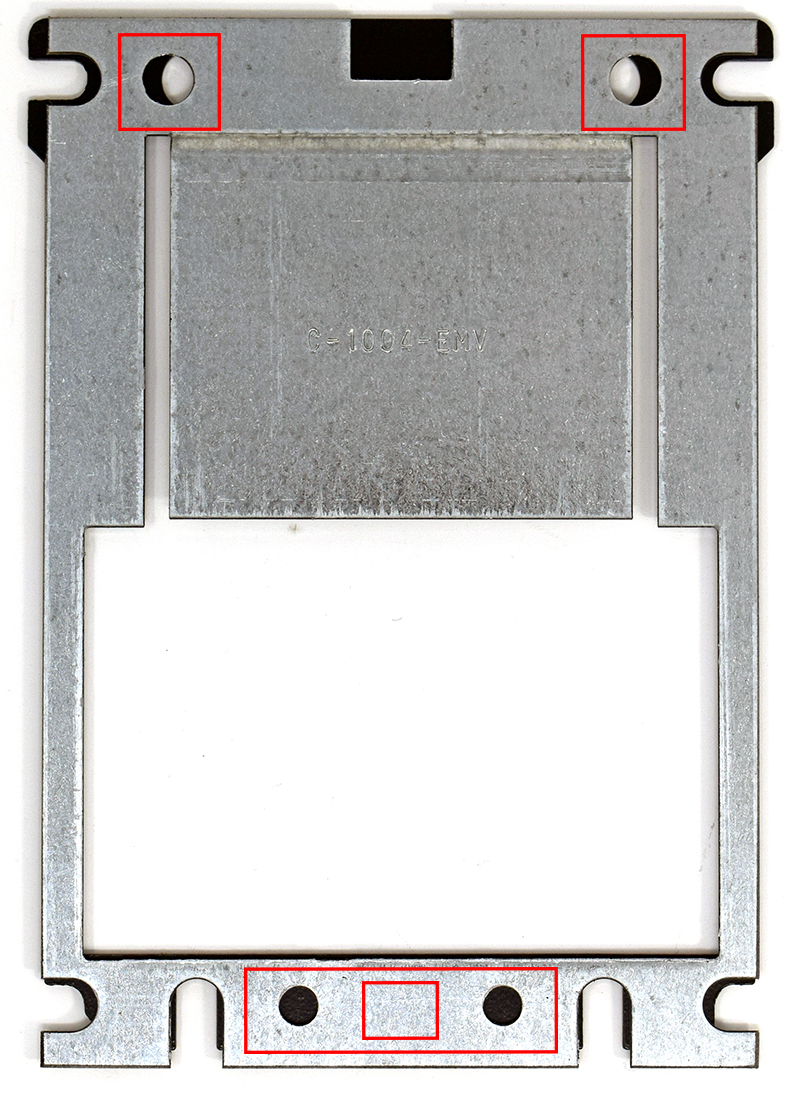
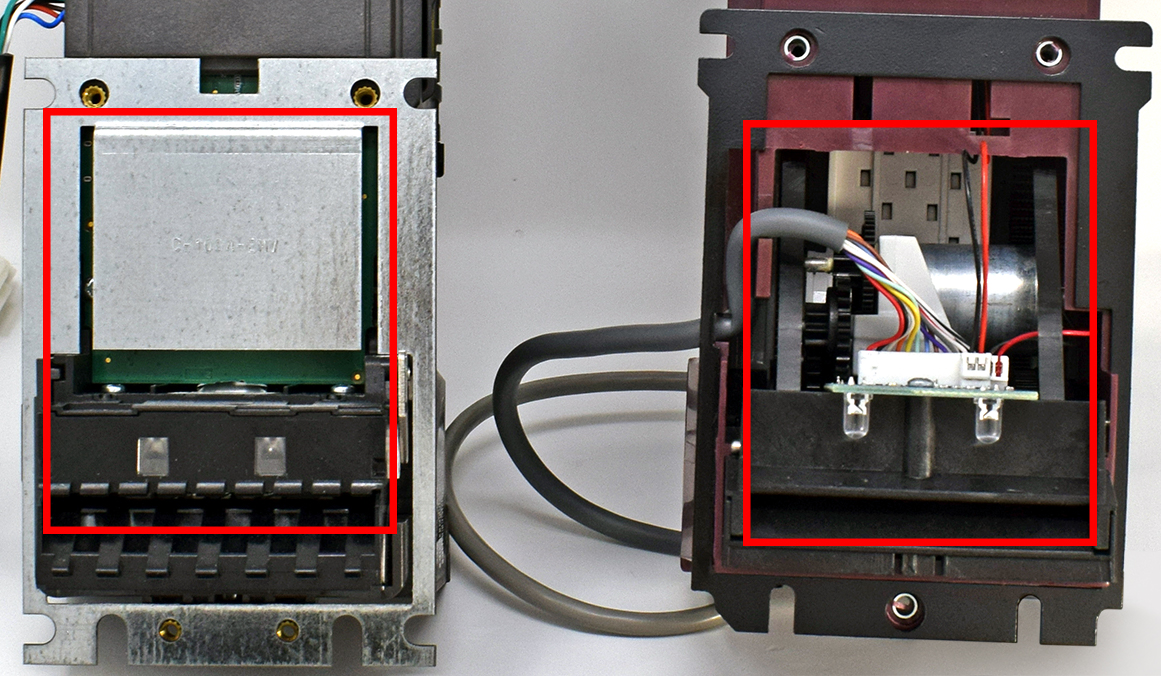
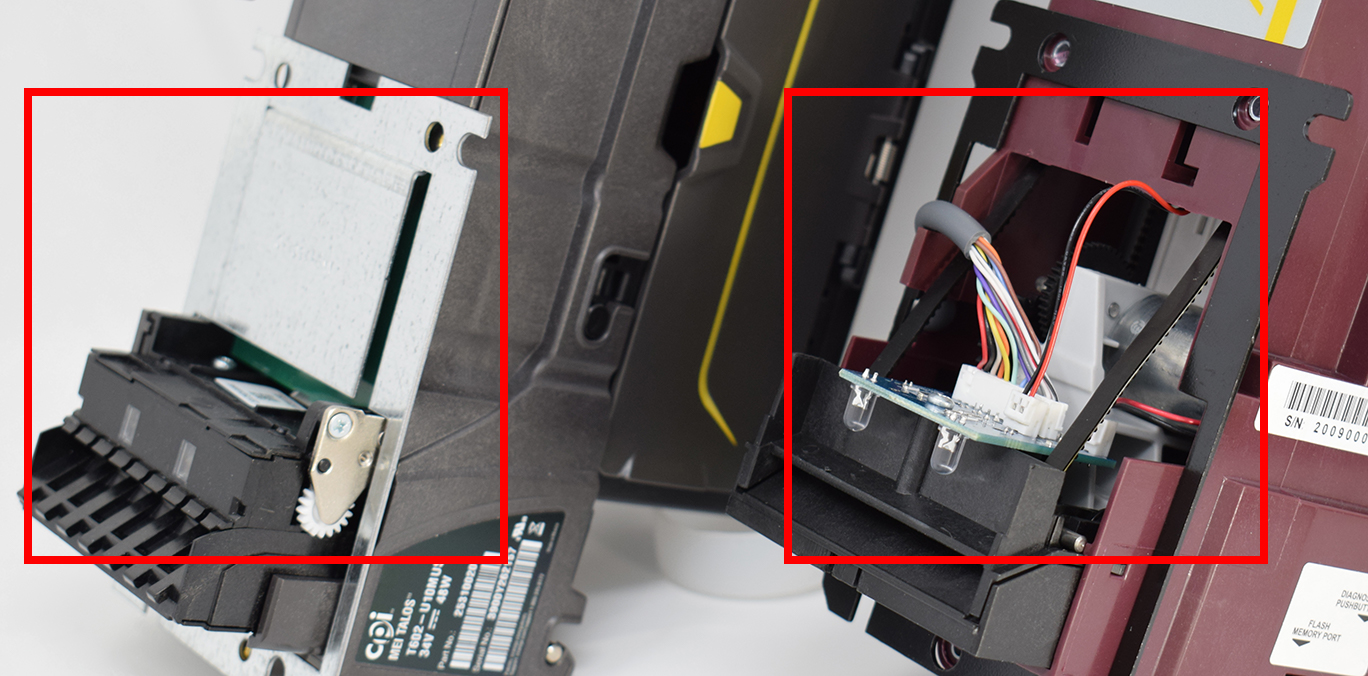
The Pyramid BNA internal components behind the front bezel sit above the bill insert slot vs. the MEI bezel which utilizes the C-1004-EMV cover plate.
- Due to these differences, the Pyramid BNA is not compatible with the MEI Combo Bezel or the C-1009 EMV Bezel.
X-Changer Installation
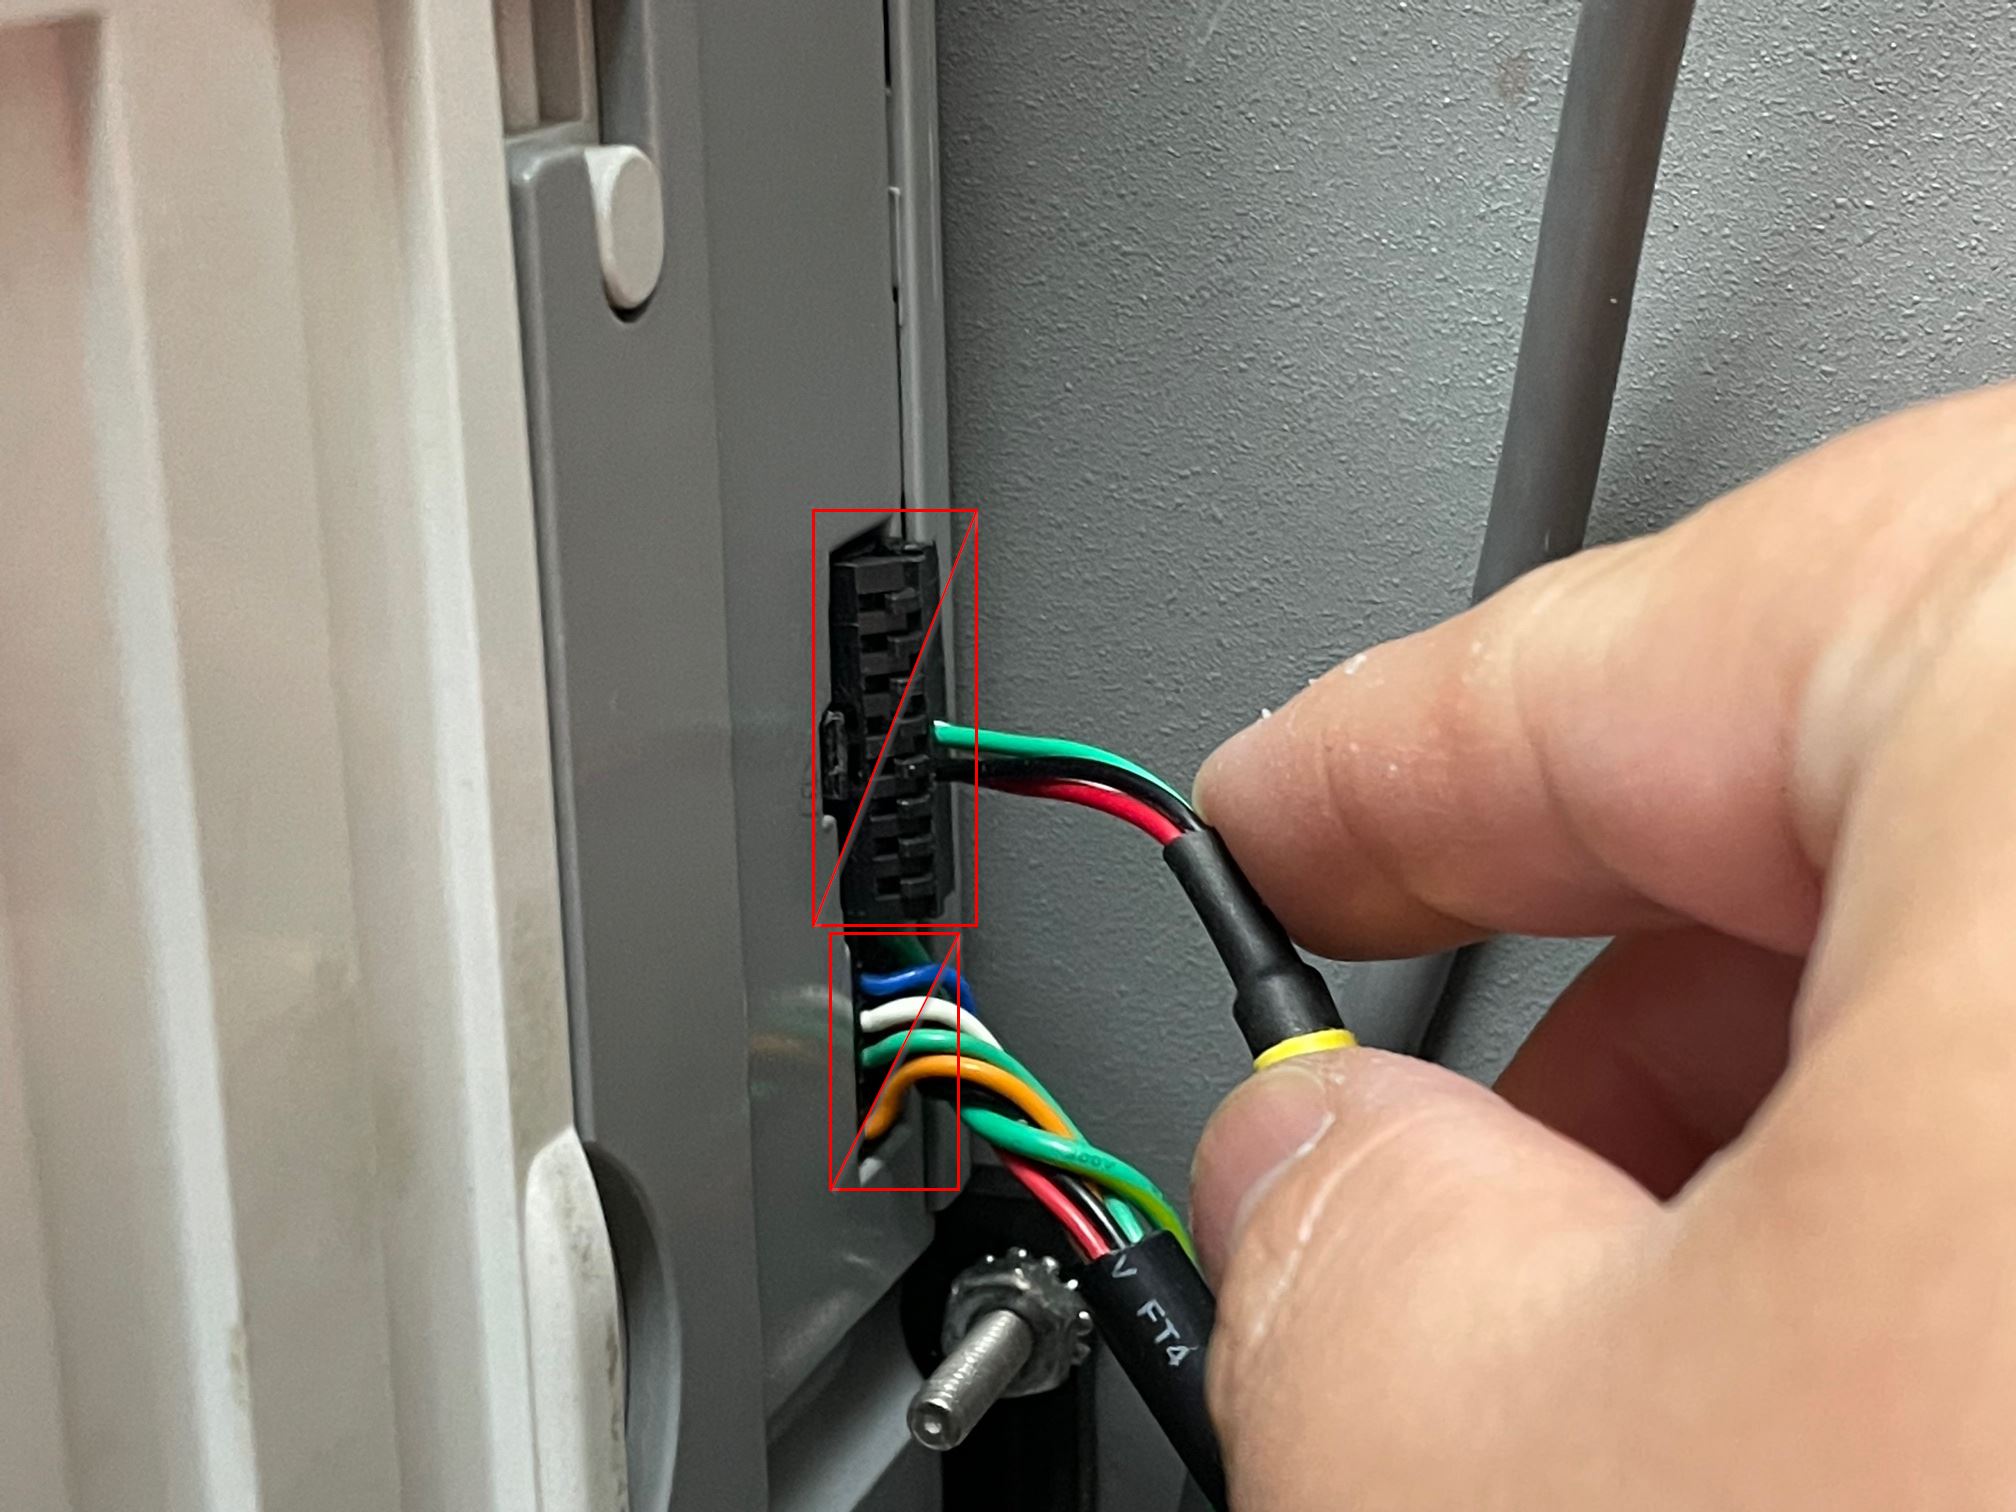
- If replacing an MEI Bill Acceptor, disconnect the two (2) harness on the side of the previous bill acceptor as well as their opposing ends. These two harnesses adapters will not be used on the Pyramid BNA.
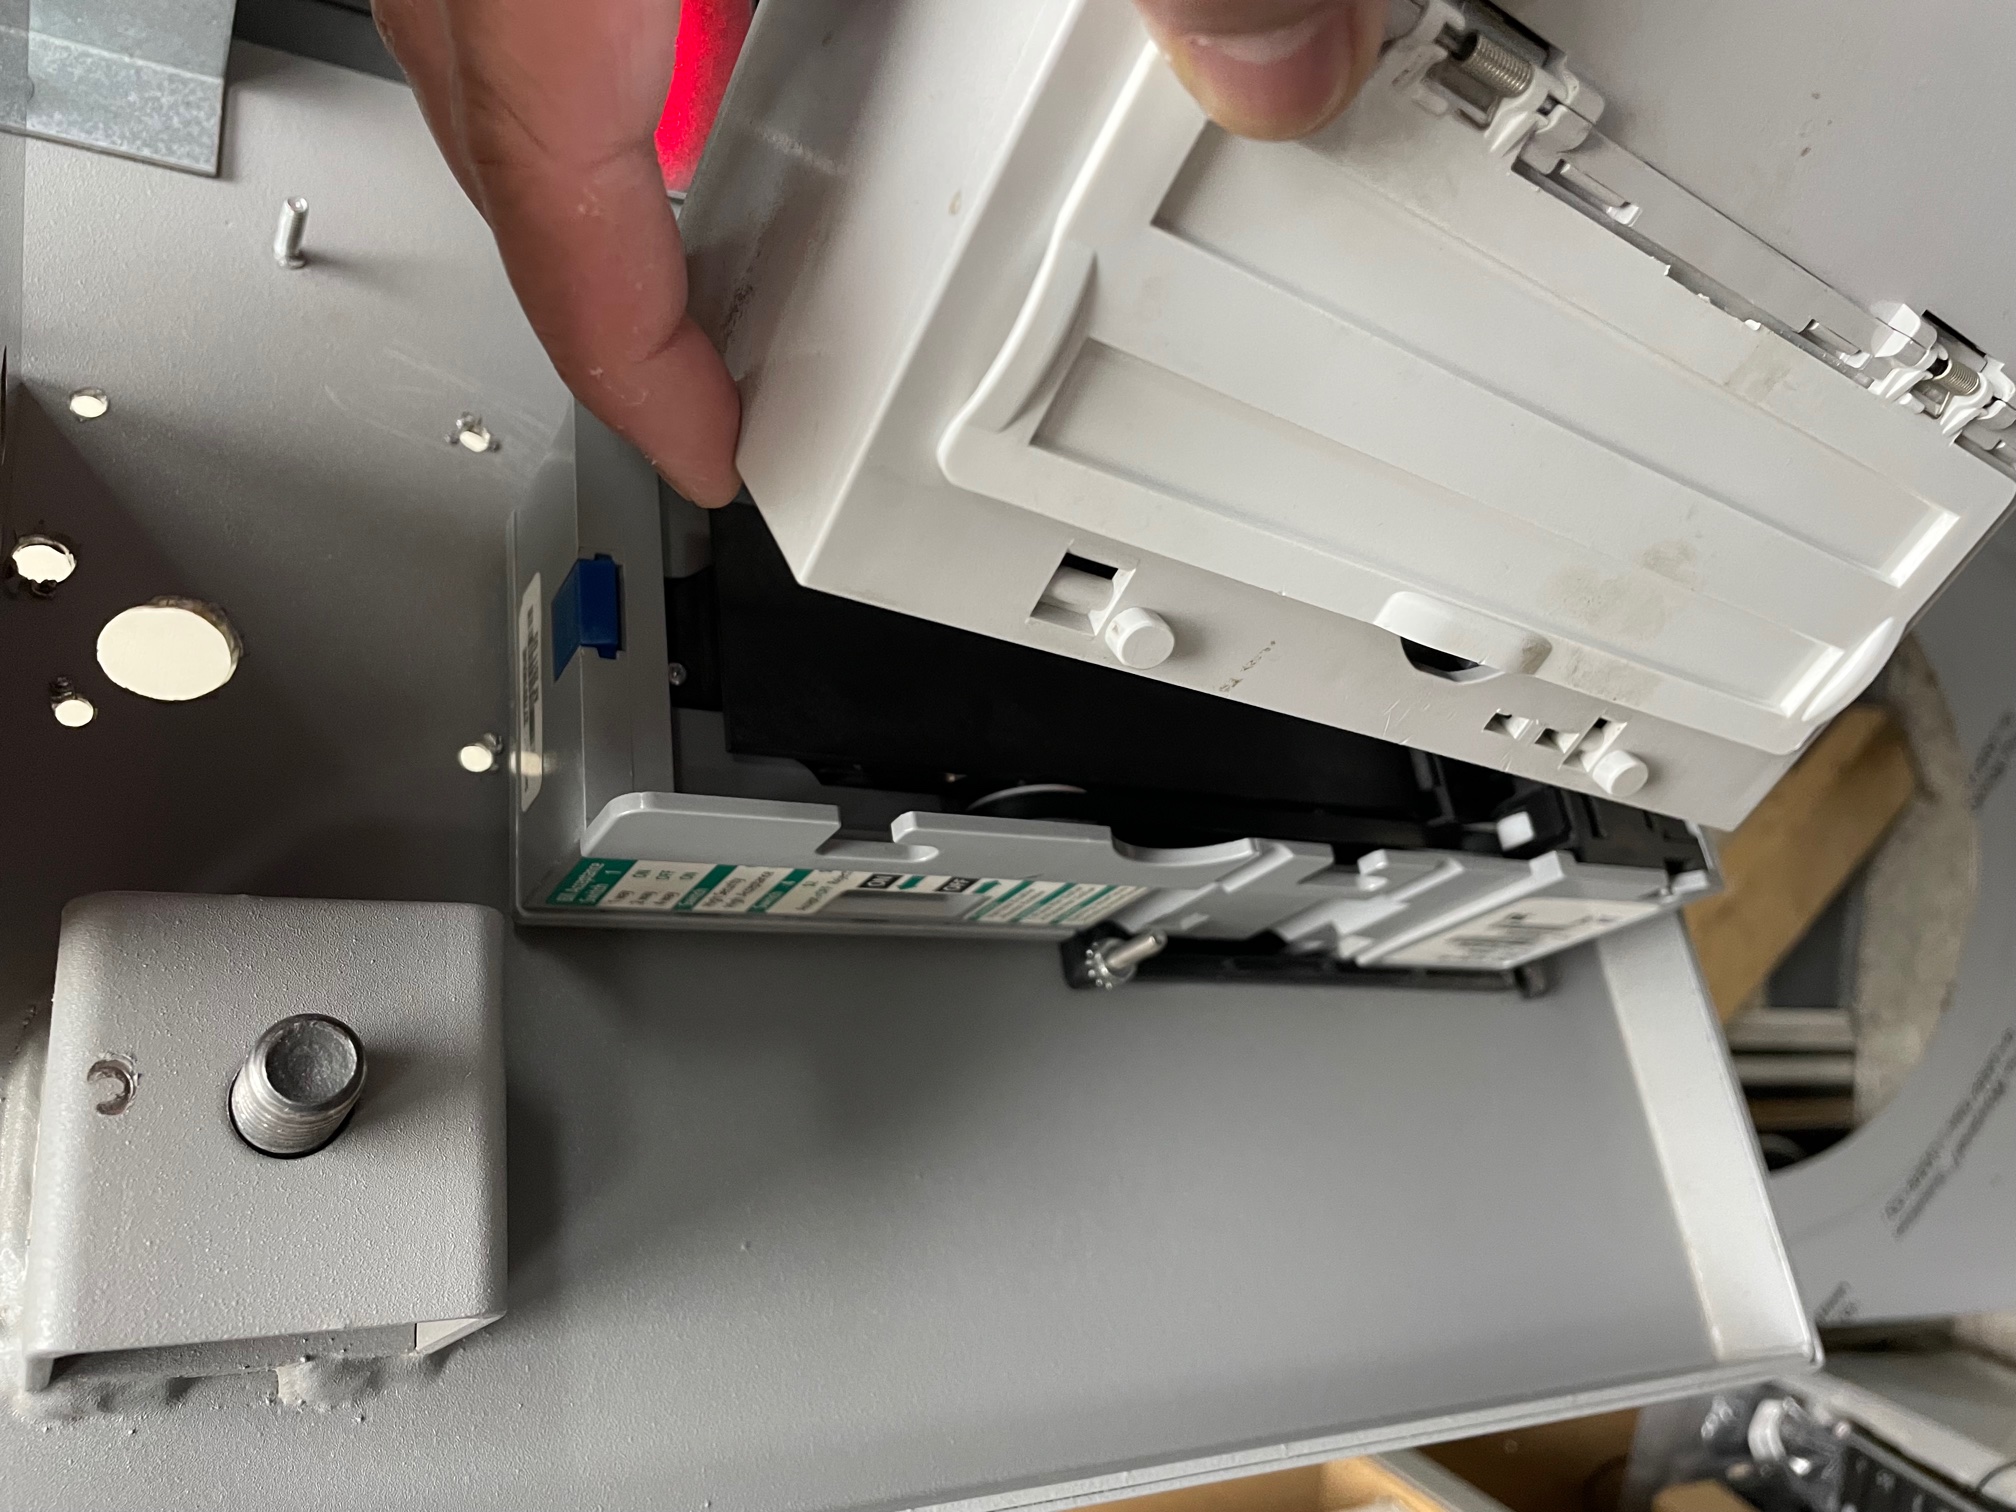
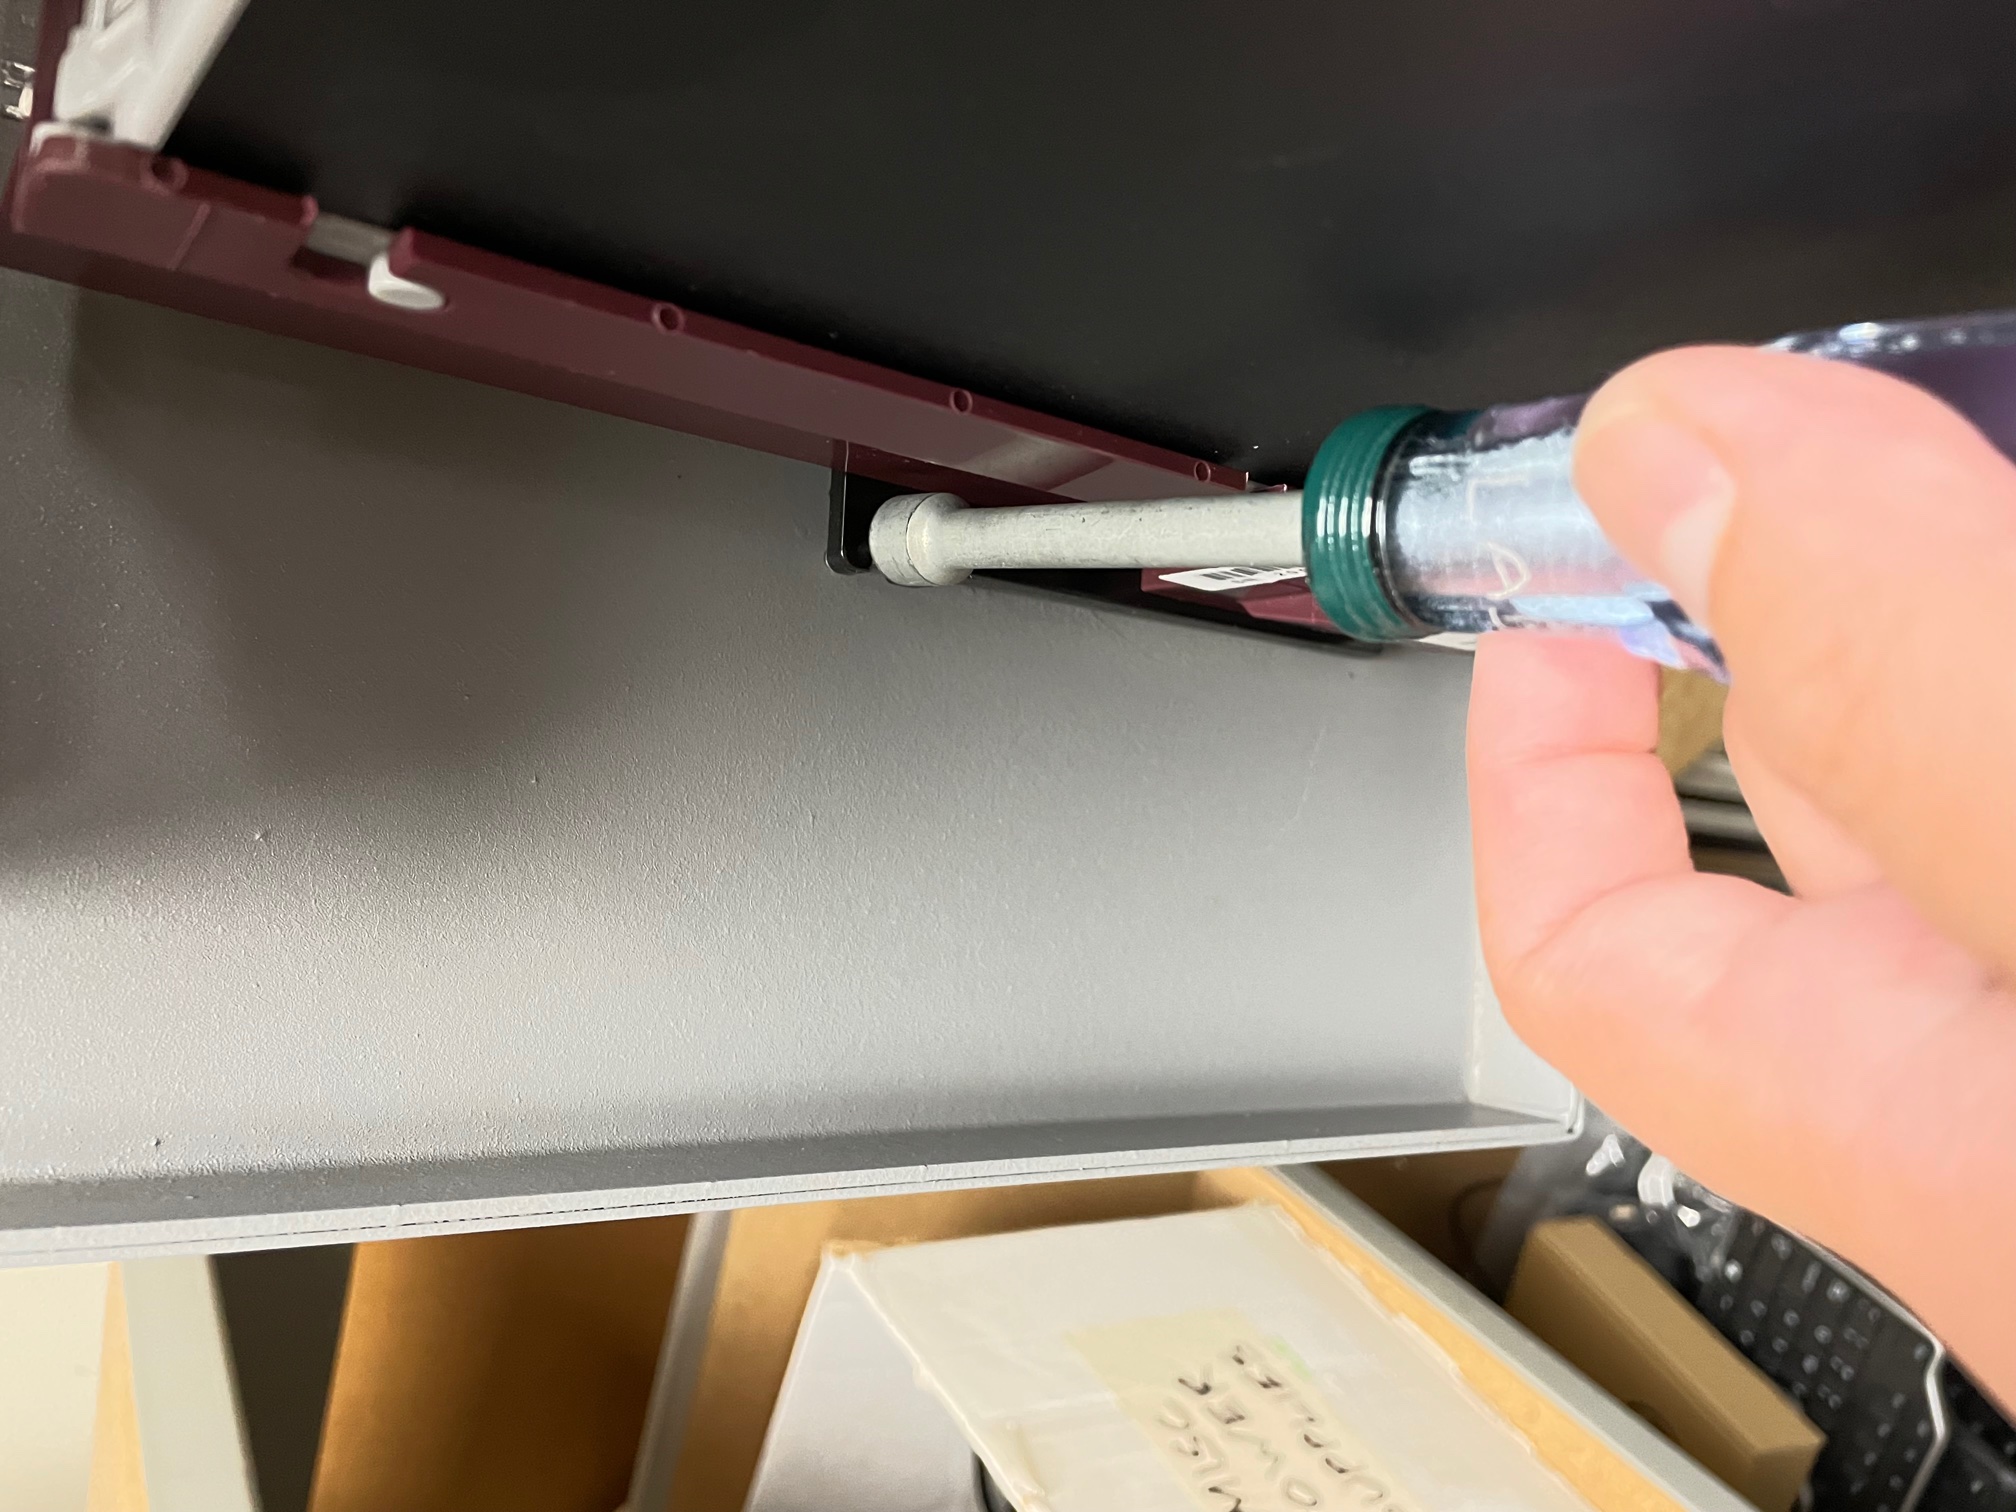
- With an 11/32" hex driver, unmount the previous bill acceptor from its four (4) mounting nuts and remove the previous BNA.
- Remove the bill stacker prior to removing the kep nuts, if unable to remove the kep nuts with the stacker still attached.
- Remove the bill stacker prior to removing the kep nuts, if unable to remove the kep nuts with the stacker still attached.
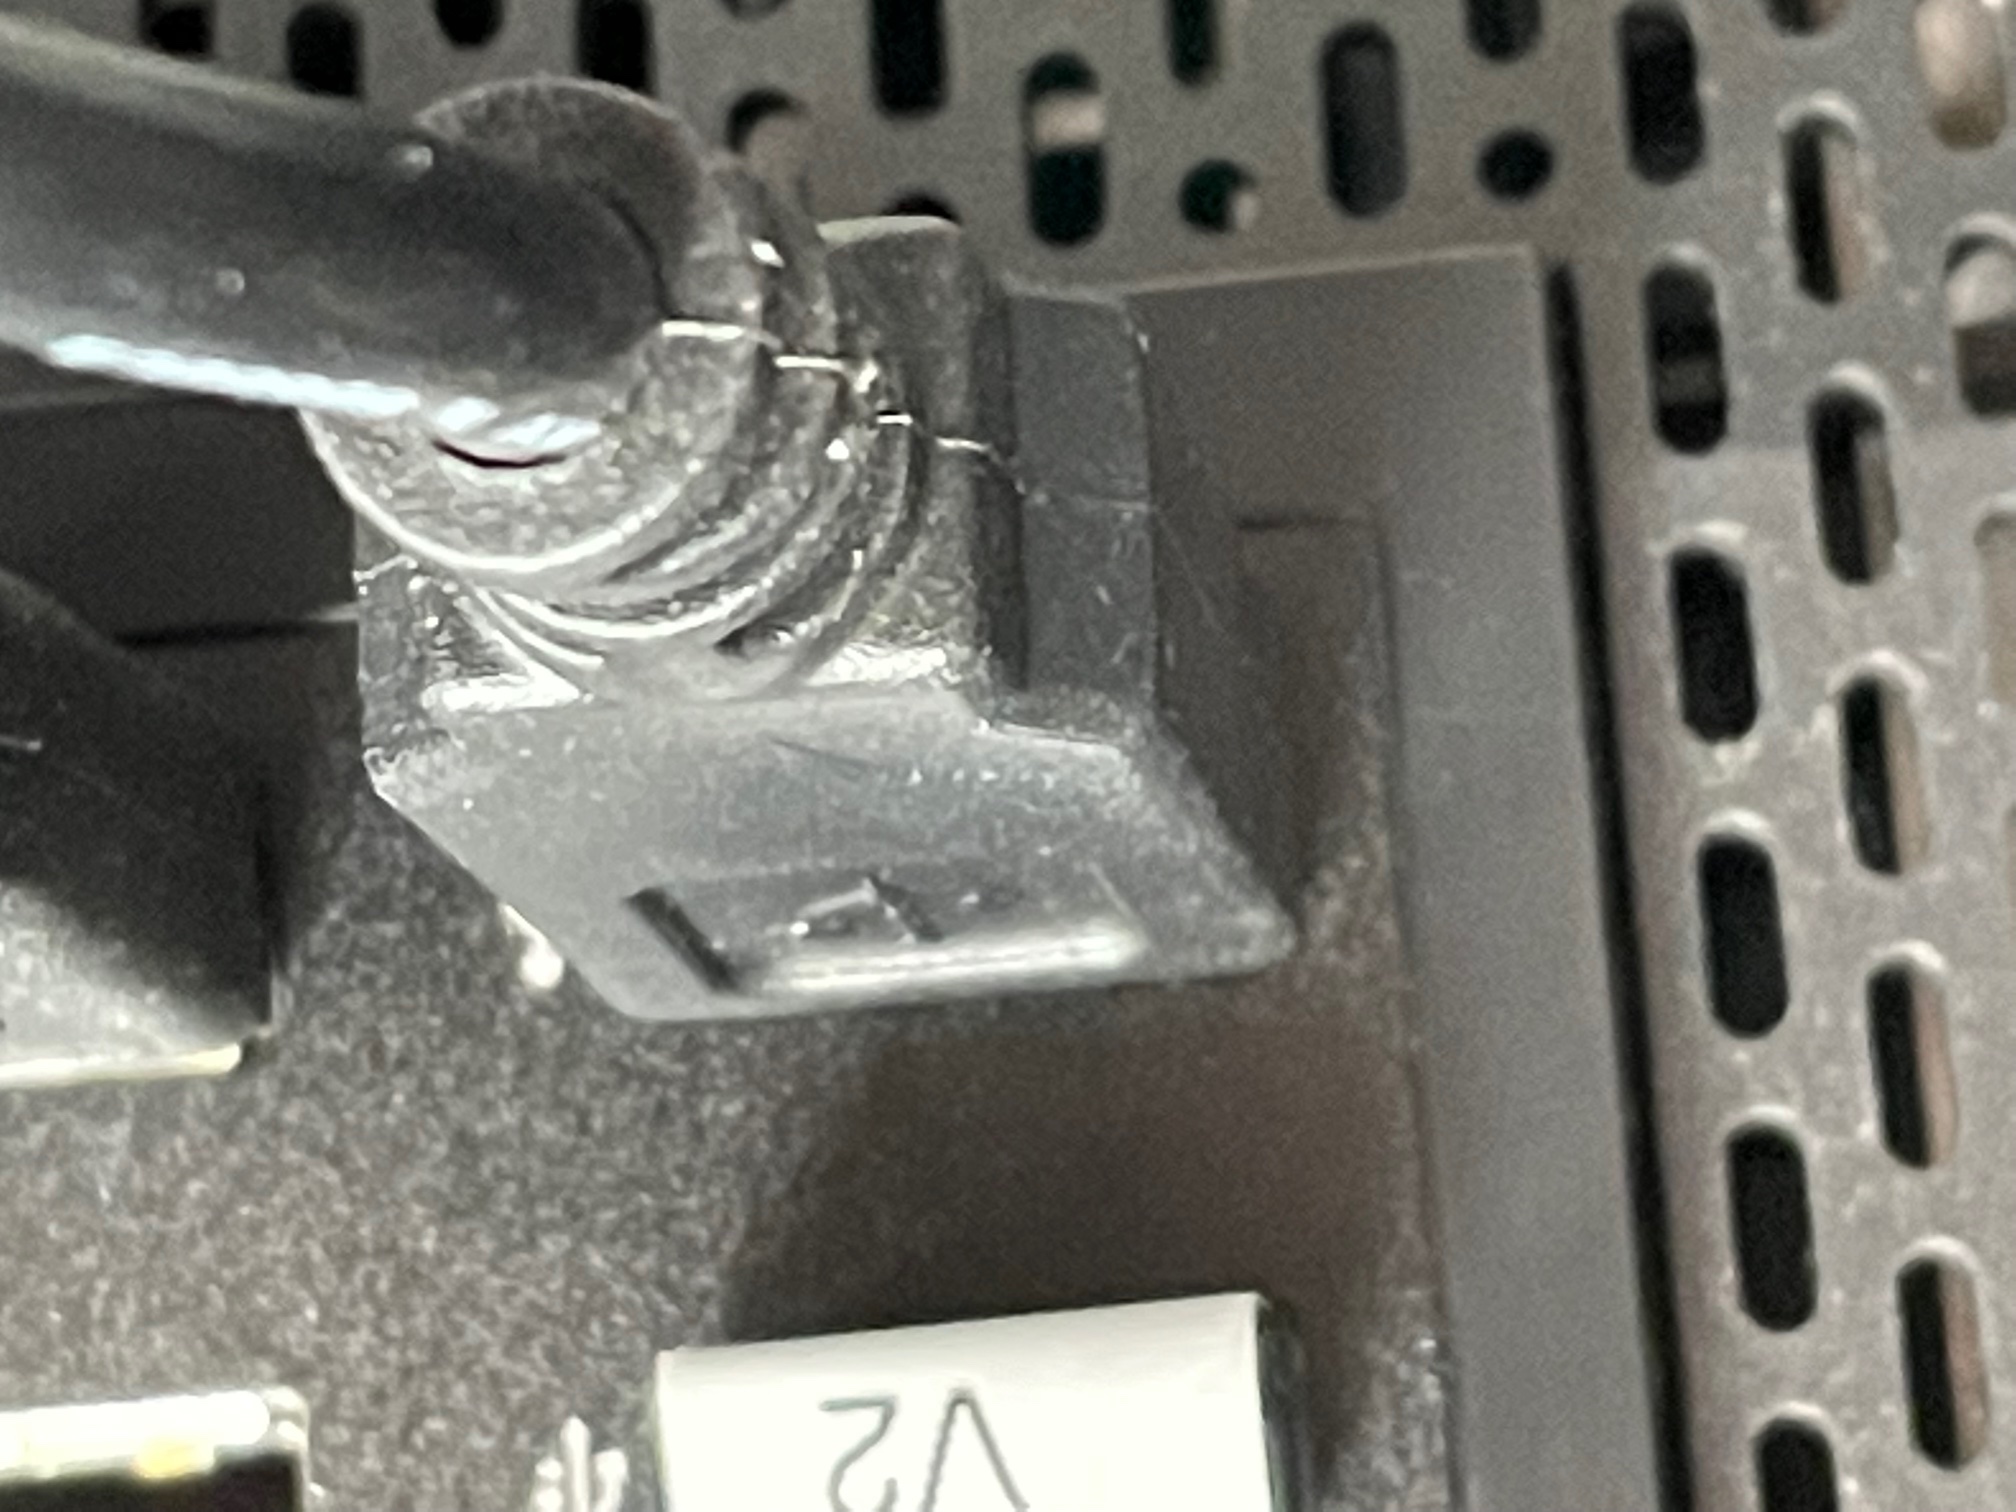
- Connect the 9-pin square male power harness on the BNA into the 9-pin square female connector where the previous power harness connected to, as well as 6-pin pulse harness into the local reader.
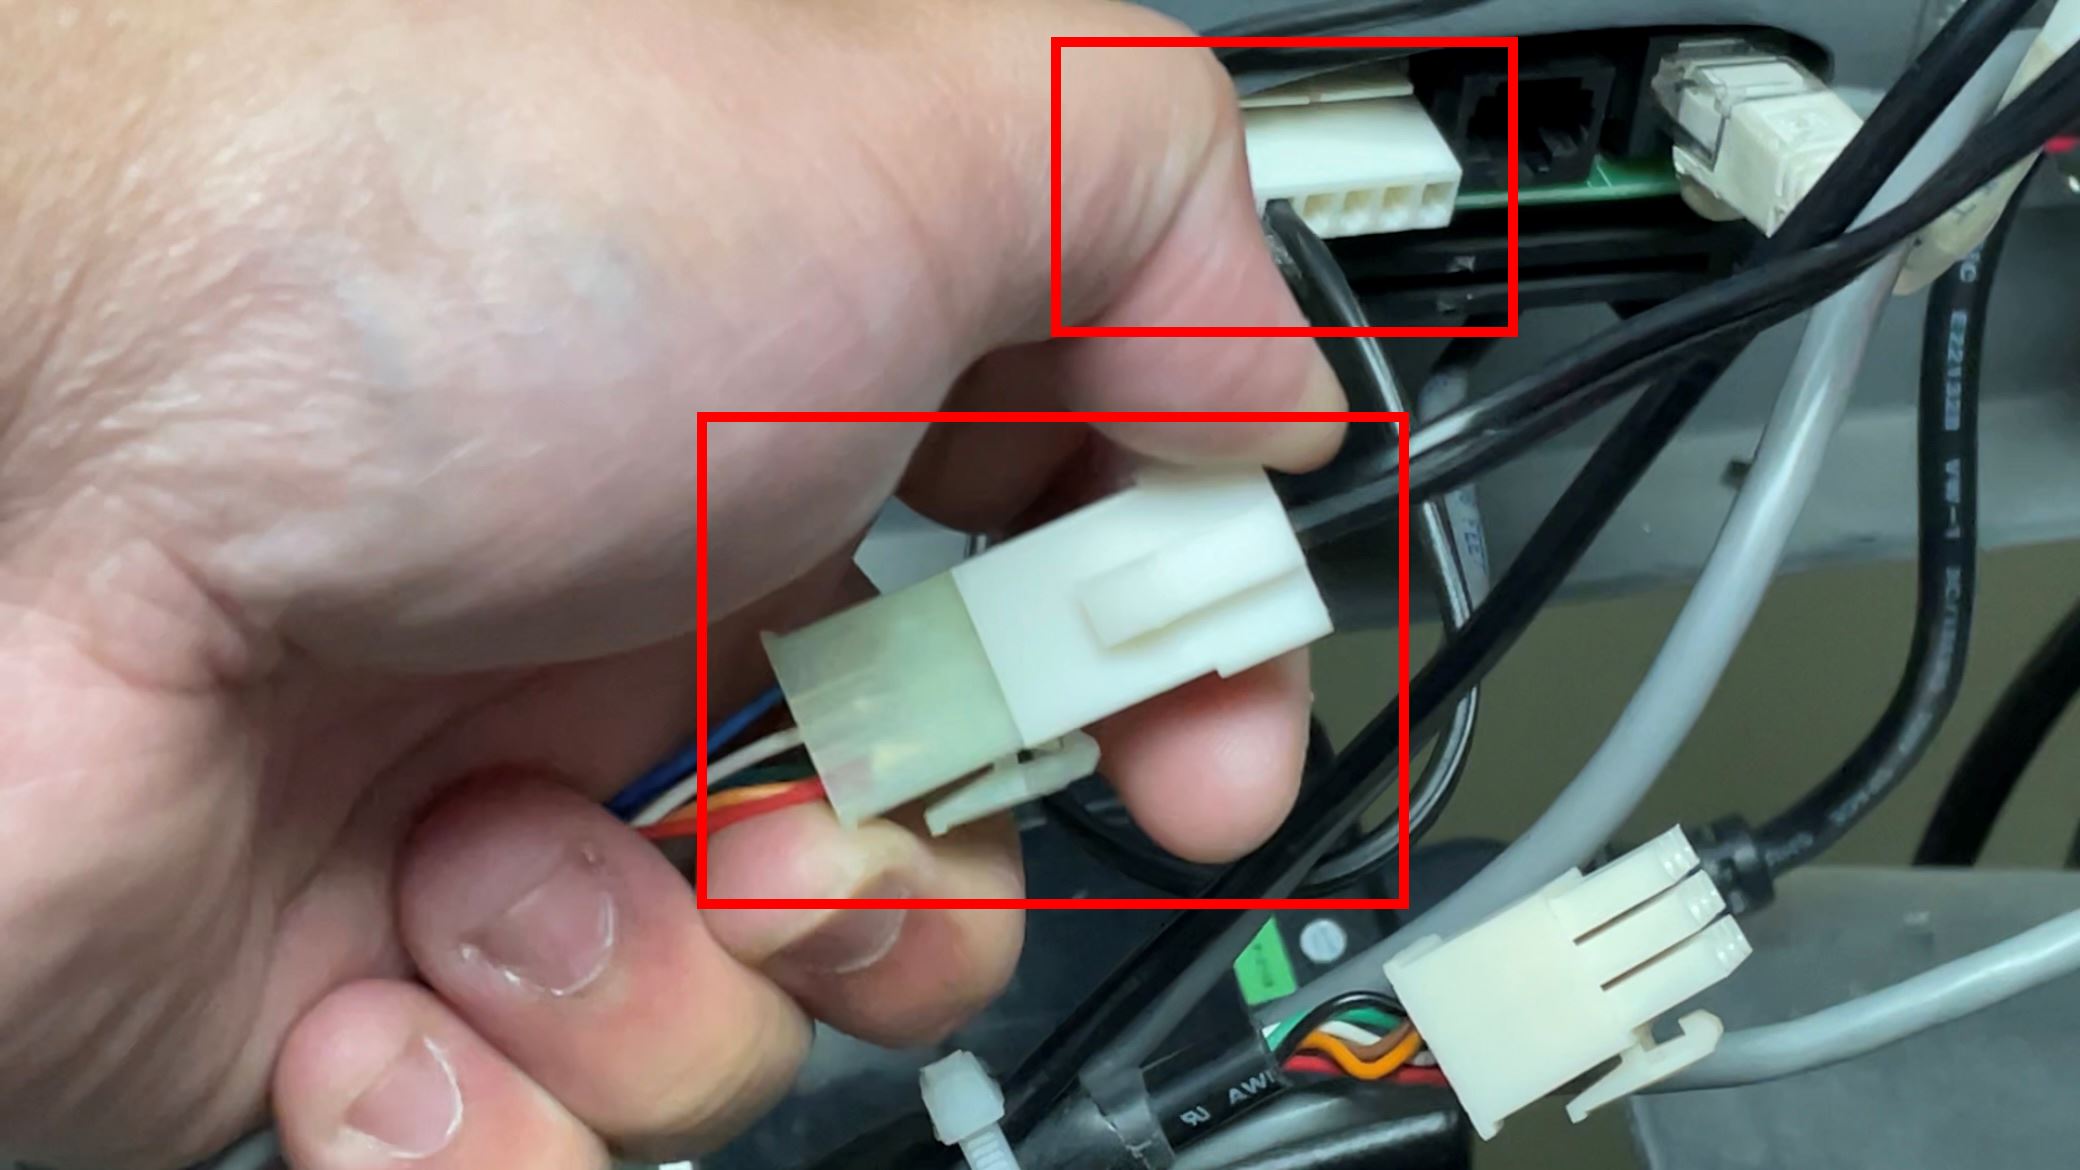
Connect the Pyramid 18-pin Serial-to-USB adapter into the BNA's I/O connector and onward to an available USB port on the X-Changer.
- Mount the Pyramid BNA to the X-Changer in place of the previous bill acceptor's mounting slot.
- Continue to Bill Note Acceptor Configuration and LaundryCard Hardware Configuration and Testing.
Bill Note Acceptor Configuration
IMPORTANT
Per Pyramid Technologies, Inc., It is strongly recommended to fill out the Configuration Card with a black permanent marker.
Configuration of the Bill Note Acceptor in the field is achieved using a printed fill-in card provided by Pyramid.
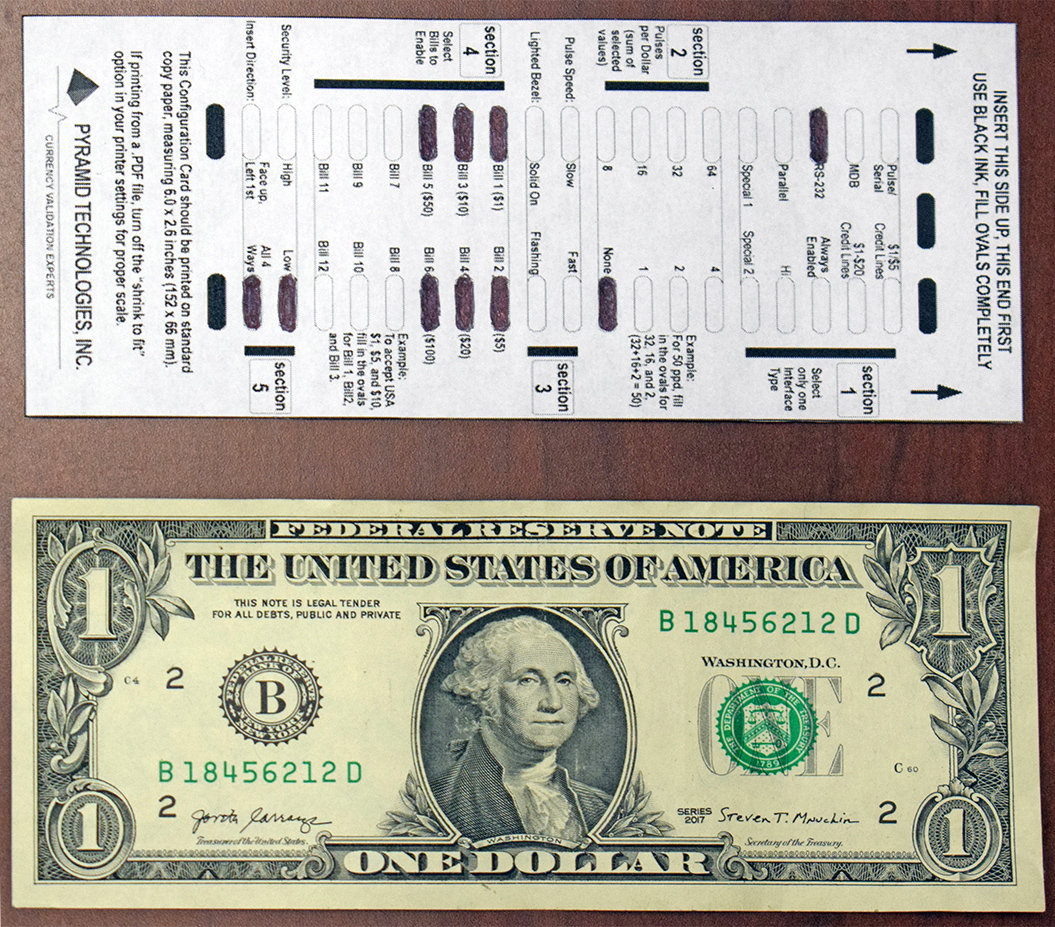
The card must be correctly, properly scaled to insert into the bill acceptor in similar fashion to inserting cash.
Additionally, every applicable section must be filled out for the bill acceptor to acknowledge and update any configured settings.
| Section Number on Configuration Card | Description |
|---|---|
Section 1 You can select only one interface type. | For LaundryCard: RS-232 - True RS-232 or TTL RS-232 interface. |
| Section 2 These lines select the Pulses Per Dollar. | For LaundryCard: Fill out “None” as the system is not using any type of pulse mode. |
| Section 3 (Pulse Speed / Lighted Bezel) | For LaundryCard: Fill out Flashing for Lighted Bezel. |
Section 4 (Enable Bills) These lines determine which bills you want enabled. | For LaundryCard: Fill in the appropriate Block to enable a bill. The other lines labeled “Bill 7” through “Bill 12” are for special bills or custom configurations only. Note: Testing determined $50 and $100 configurations may not be accepted or the system may not be receptive of high value currency even when enabled. |
| Section 5 (Security Level) This line is used to select the security of the bill acceptor. Select either low or high security. | Low security should be used when the user knows that the likelihood of counterfeiting is low. High security should be used when the acceptor is configured to accept high denomination currency. You must select one option. |
| Section 5 (Insert Direction) This line is used to select the direction of bill acceptance. Bills can be accepted in all four directions or “Face up, left” which means face up, black seal first. | Select the appropriate direction of insertion. You must select one option. |
Configuration Card Instructions
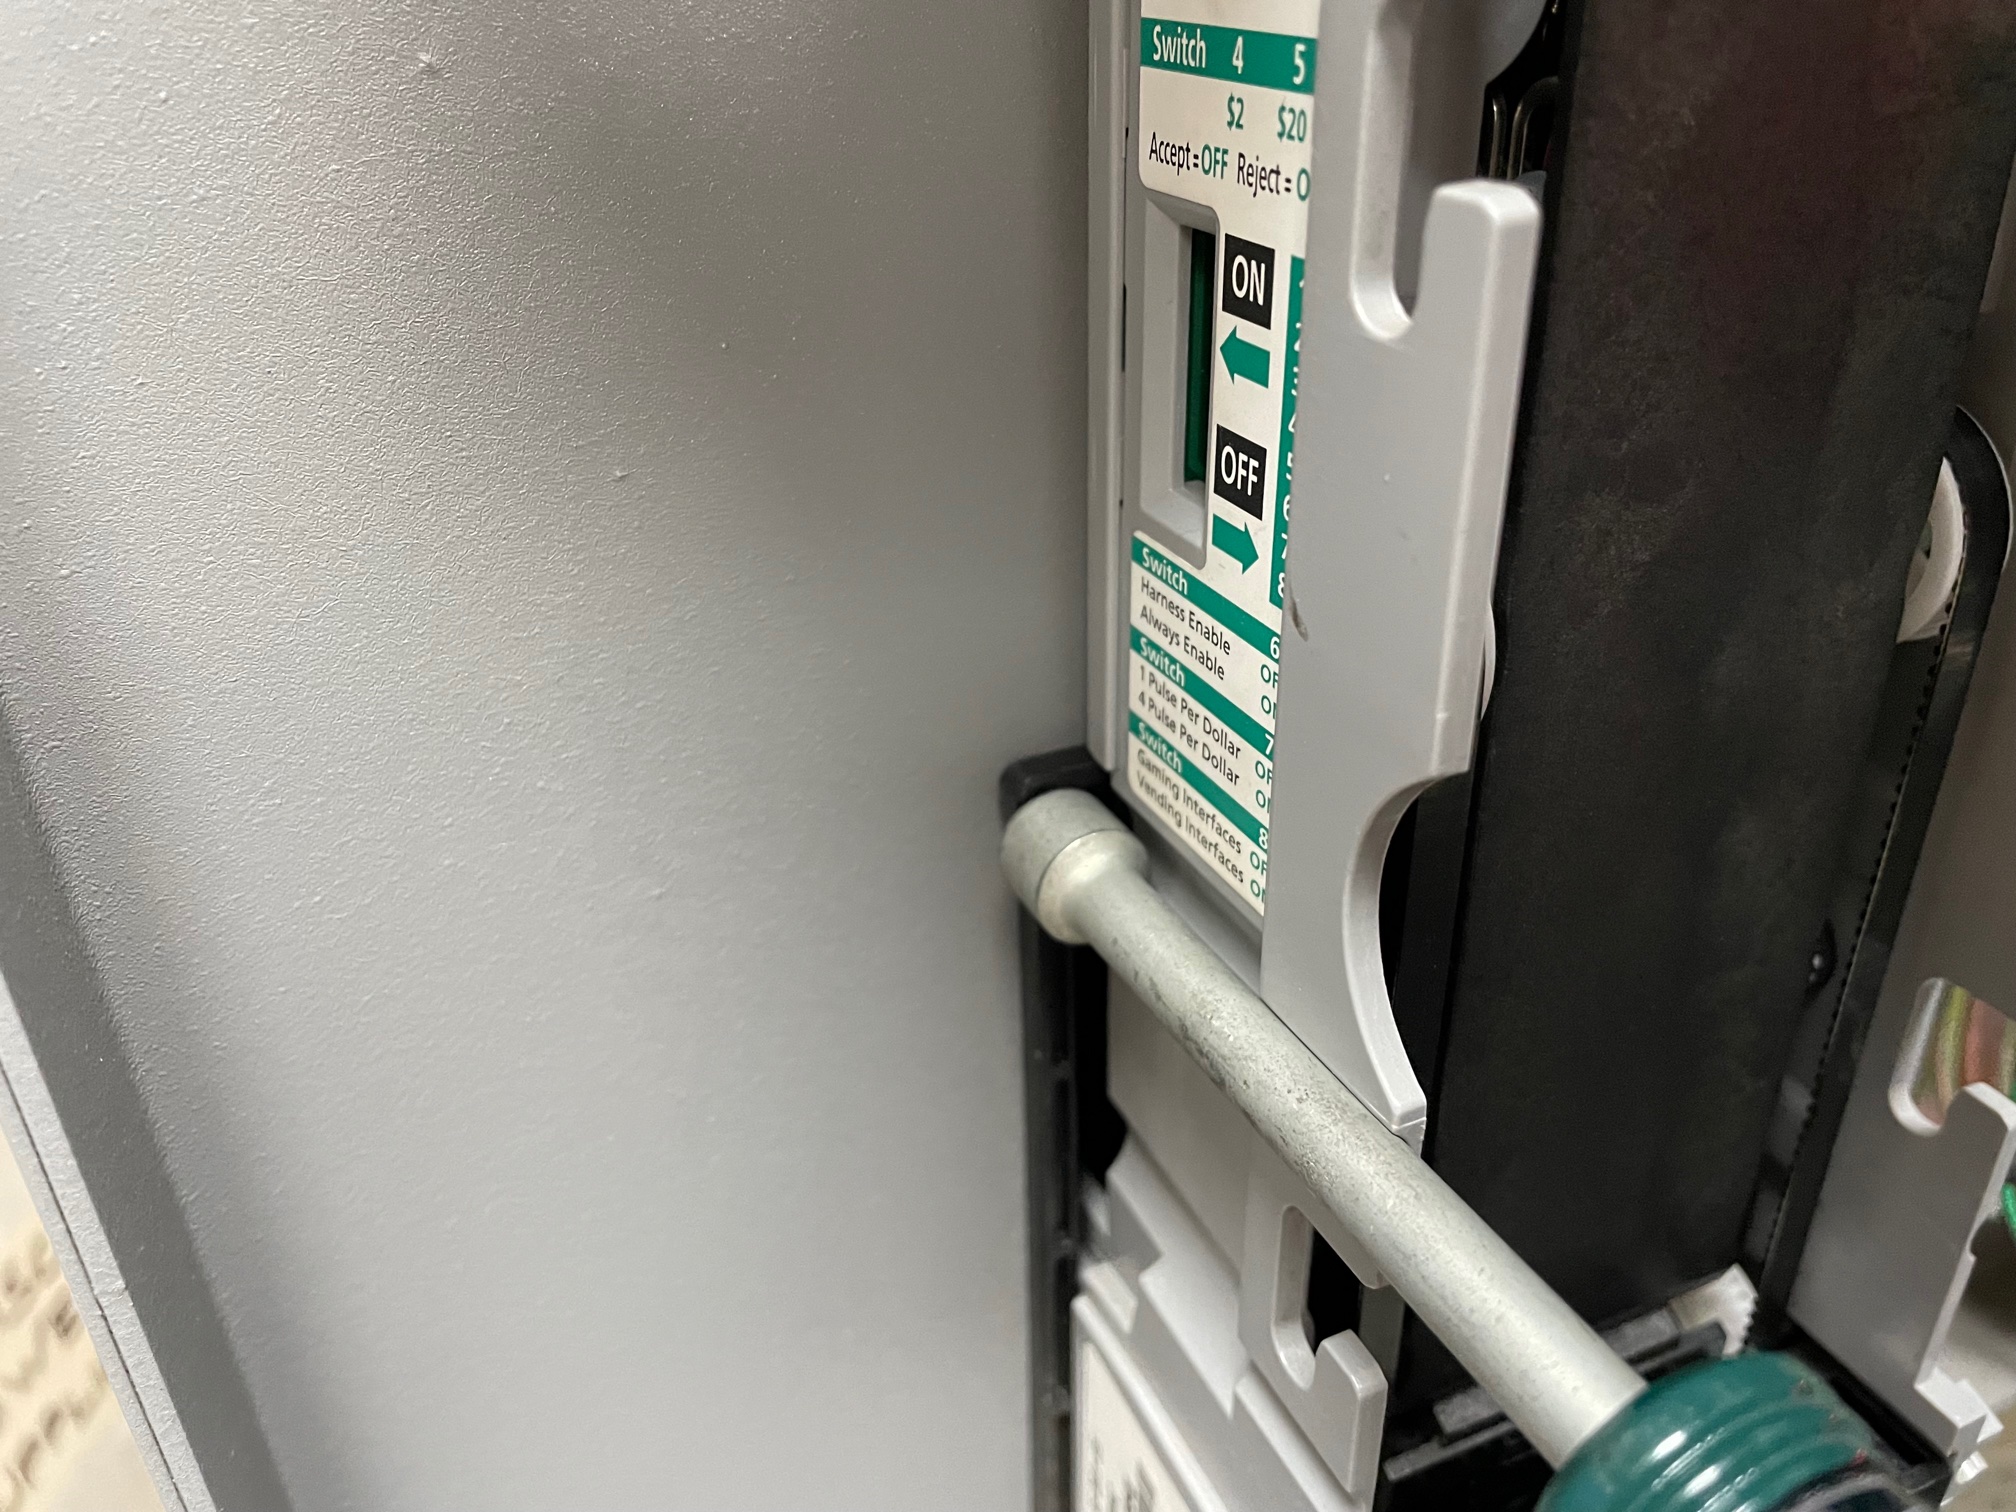
- Make sure power is applied to the bill acceptor and all DIP Switch positions are set to OFF.
- Press and hold the Diagnostic Pushbutton for at least ten (10) seconds, then release.
- The Diagnostic Pushbutton is located at the rear-left of the bill acceptor (or front-right when looking at the acceptor from the front).
- The bezel lighting on the front of the acceptor will flash ten (10) times.
- Insert the Configuration Card into the acceptor, arrows first, printed side face up.
- The acceptor will hold the Configuration Card for a second or two, then feed it back to you.
If the bezel lights flash rapidly:
- The acceptor has read the Configuration Card correctly.
- The configuration is now in permanent memory in the bill acceptor.
- The acceptor will reset itself.
- You can now begin using the acceptor.
If the bill acceptor has not read the Configuration Card correctly, the bezel lights will flash slowly a certain number of times. The number of flashes will tell you which Section of the card it cannot read correctly (e.g. 5 times if Section 5 is not properly read, etc.).
If this occurs, make sure that the Section is filled in neatly. The bill acceptor will stay in the Configuration Mode until it has correctly read a Configuration Card, or if you remove power to the acceptor.
LaundryCard Hardware Configuration and Testing
IMPORTANT
It is strongly recommended to complete the following with the assistance of CCI Technical Support.
With the Pyramid BNA powered and separately configured, the LaundryCard application must also be reconfigured to accommodate for the hardware update.
When accessing the X-Changer, ensure either the system has been updated to LaundryCard v9.1.4+, or that the updated Configure Hardware tool that coincides with v9.1.4+ is available.
- Open File Explorer (Shortcut <Win+E> or clicking the folder icon on the taskbar).
- Navigate to D:\Setup\InstallProc.
- Execute ConfigureHardware.cmd and complete all follow-up prompts.
- When first running ConfigureHardware.cmd, a selection section will appear to confirm whether the X-Changer is utilizing the older generation V1 cabinet IDTech USB Card Swipe or a V2 cabinet with a Pyramid BNA. You must select the Pyramid BNA option.
If configured correctly, the system may either reboot to accommodate for the port changes, or go right into the Valuestation Diagnostic Tool without rebooting, which the Pyramid BNA can be tested in the Bill Acceptor section.